Most Halloween hair content for men is a photograph and a character name. Which is fine until you are standing in front of a mirror at seven o’clock with a fistful of hair and no idea what to do with it.
Long hair is the one variable where technique genuinely decides the result. A Dutch braid without grip product slips loose within the hour. Teased hair without dry shampoo has nothing to hold the matting and falls flat. Temporary colour touched before it dries transfers straight onto the costume you just bought.
So this is seventeen hairstyles with the actual method for each: what product provides the grip, how long it needs to set, and what goes wrong.
Two Things Before You Start
Grip is the whole game. Clean, freshly washed long hair is slippery and will not hold anything. Texture paste, styling gel, pomade or dry shampoo applied before you start is what makes braids stay braided and teasing stay teased. Day-old hair works better than clean hair for almost everything here.
Do not braid it too tight. Braid firmly but not tightly. Halloween styles tend to be pulled tighter than everyday ones and worn for longer, which is exactly the combination that causes tension damage at the hairline. If it stings while you are doing it, it is too tight.
One practical note: you need roughly four to six inches minimum to braid anything. Below that, skip to the texture and colour sections.
Braided
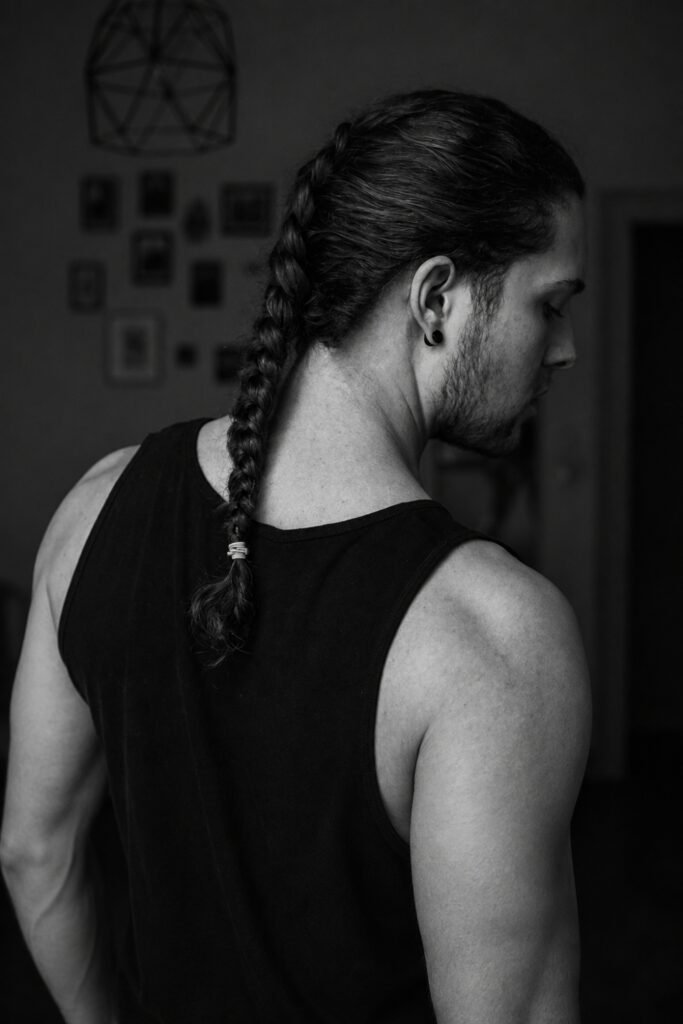
1. The Single Three-Strand Braid
Technique: work pomade or gel through the lengths first, divide into three even sections, and braid down, pulling firmly but not tight. Secure with an elastic.
The foundation everything else builds on, and worth practising before the night. On long or slippery hair the product is not optional, since sections separate and slide without it.
Start with shorter braiding sessions to build the skill rather than attempting something complex first time.
 Save
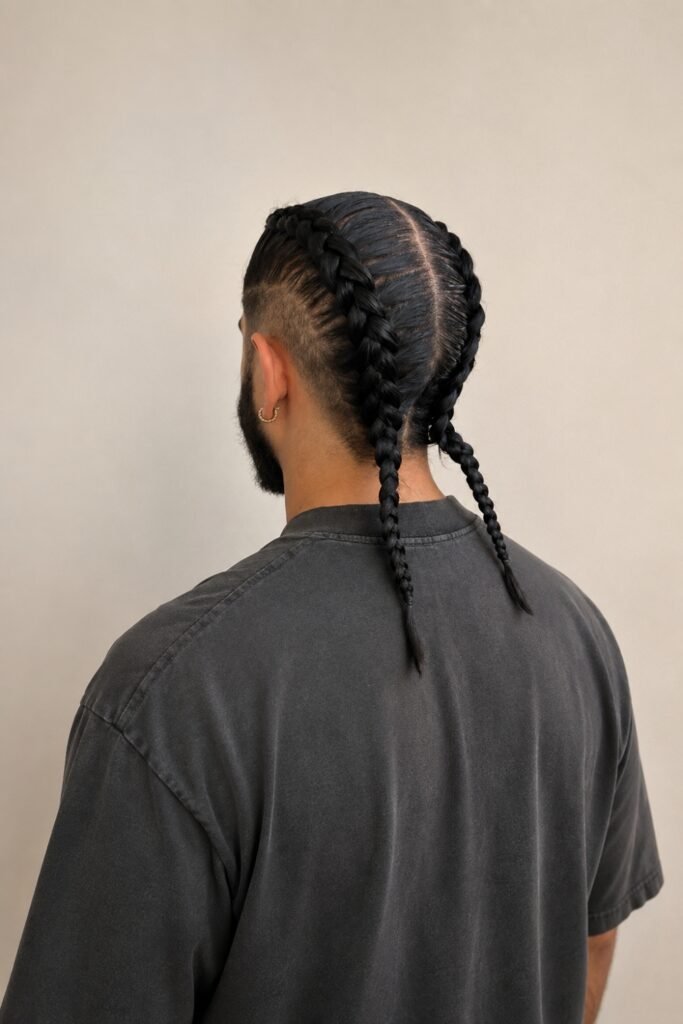
Save2. Double Dutch Braids
Technique: distribute texture paste throughout for grip. Create a centre part. Take a three-strand Dutch braid high on the head, feeding hair into the top section only. Repeat on the other side. Create a second Dutch braid underneath each, then secure the top two with an elastic and the bottom two just below.
The four-braid version is what gives the style its density, and it is the standard warrior and fantasy hair for a reason. A Dutch braid sits raised on the surface rather than flat, which is what makes it visible from a distance.
Allow considerably more time than you think for the first attempt.
 Save
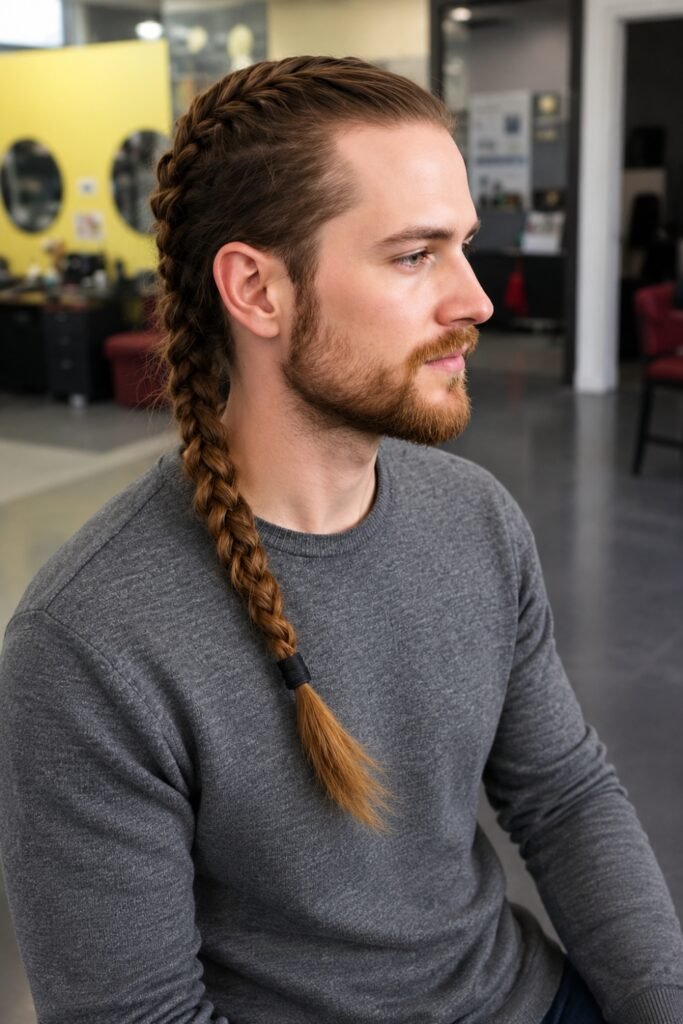
Save3. The Side Braid
Technique: sweep everything to one side, apply grip product, and braid loosely from behind the ear down over the shoulder.
The lowest-effort braid here and the most forgiving, since a slightly uneven side braid reads as deliberate where a slightly uneven centre braid reads as a mistake.
Suits pirates, rangers and anything with a rough, practical register.
 Save
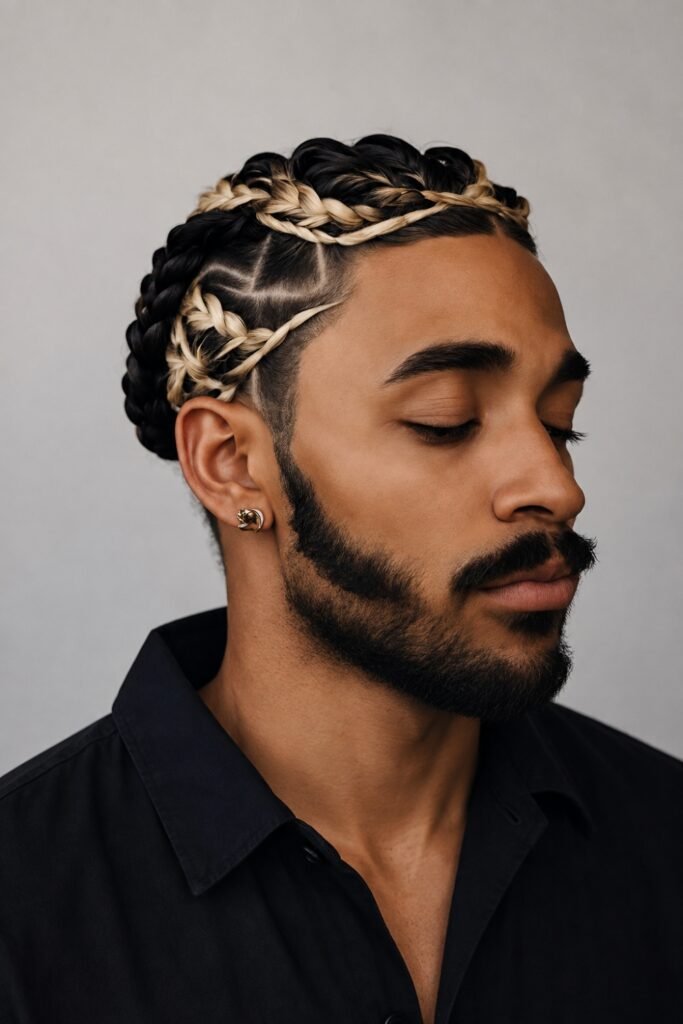
Save4. The Braided Crown
Technique: braid one or two sections and wrap them around the head, pinning where they meet at the back. Grip product first, and use more pins than feels necessary.
The most secure option for a long night, because nothing hangs loose to catch on anything. It also keeps hair completely off the neck, which matters in a warm costume.
Pin at the sides rather than the crown if you are wearing anything on your head.
 Save
Save5. Braids Gathered Into a Ponytail
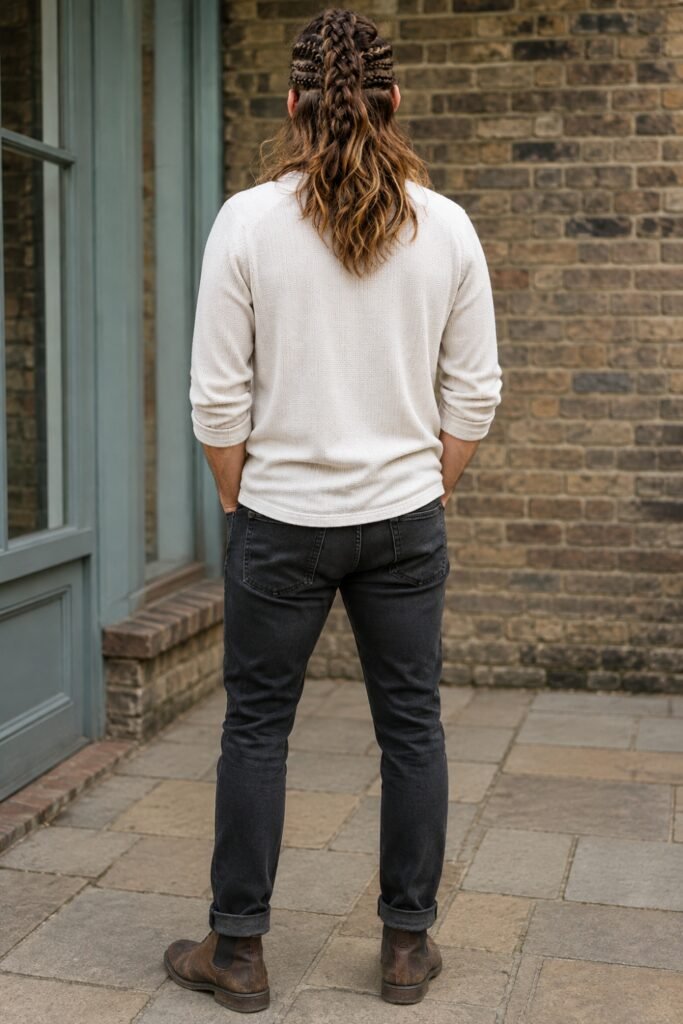
Technique: braid two or more sections, leave the rest loose, then gather everything including the braids into a ponytail at the crown or nape.
Solves the practical problem of braids getting in your face while keeping the braided texture visible. It is also considerably faster than braiding the whole head.
The best compromise if you want the look without an hour of braiding.
 Save
SaveTied and Gathered
6. The High Ponytail
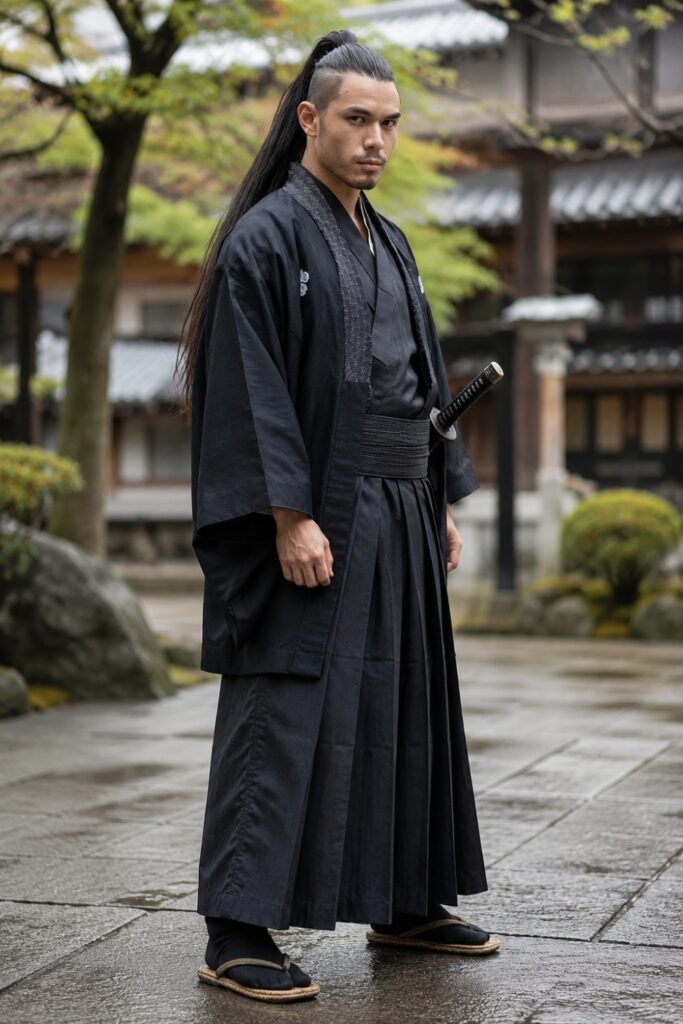
Technique: brush thoroughly, gather high at the crown, secure tightly, and tease the section underneath if you want volume in the tail.
Simple, but the height changes the character entirely. High reads martial and severe; the same hair at the nape reads formal and restrained.
Tease the roots before securing if you want lift at the crown rather than a flat pull.
 Save
Save7. The Low Queue
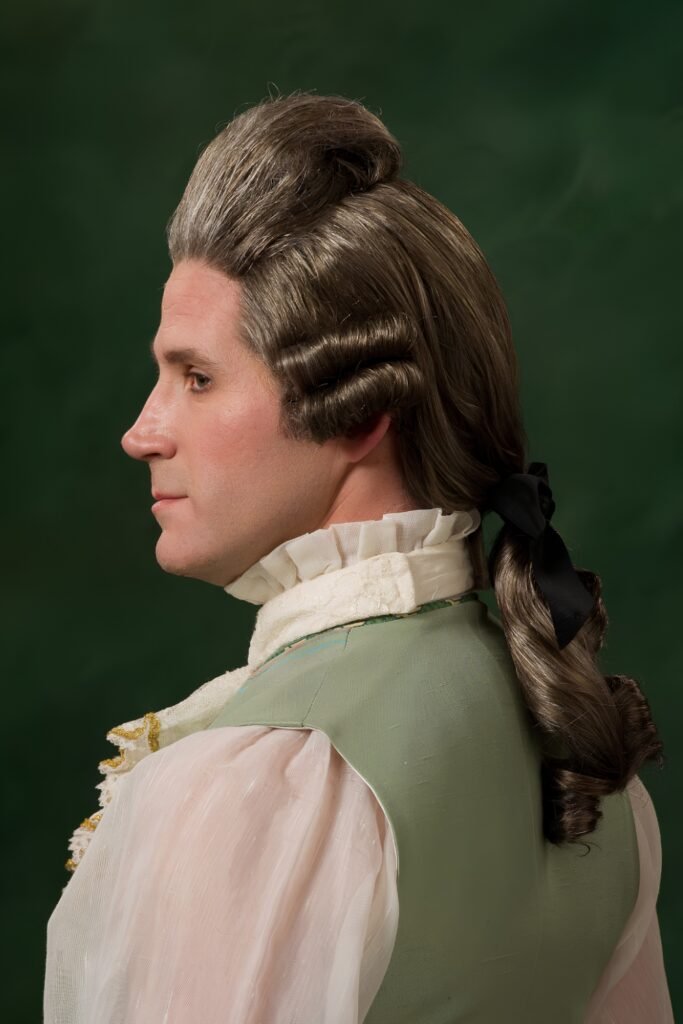
Technique: smooth with pomade, gather low at the nape, and secure with a ribbon or leather cord rather than a modern elastic.
Historical and formal, and the cord is doing real work. A visible black elastic breaks the period illusion instantly where a ribbon reinforces it.
Suits anything from the eighteenth century backwards or forwards a century either way.
 Save
Save8. The Top Knot
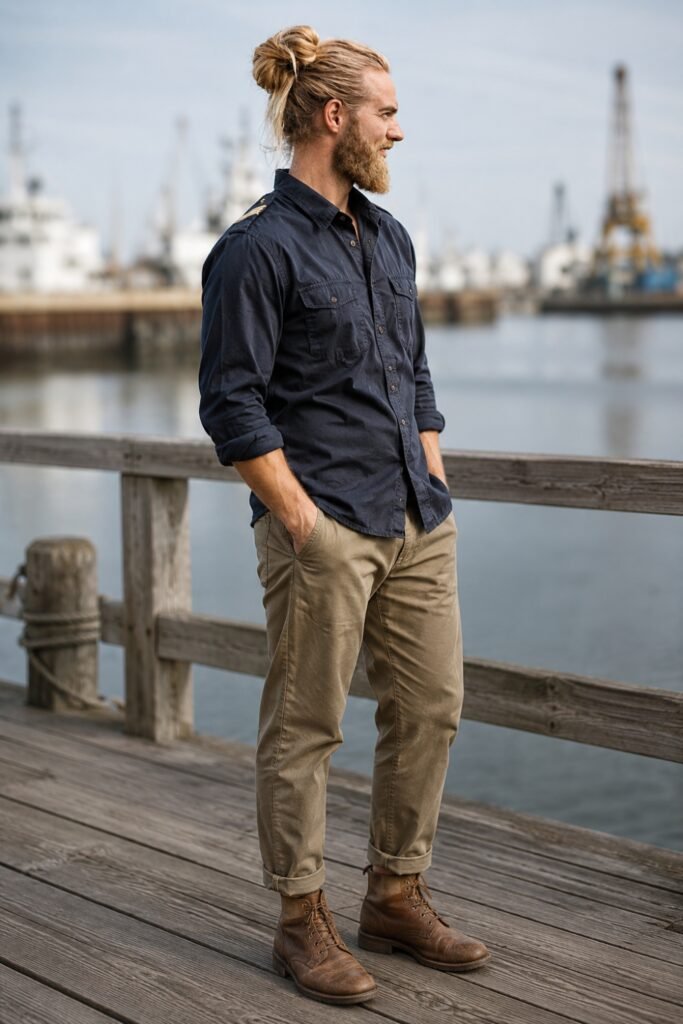
Technique: gather high, twist the length around the base, and pin or secure with an elastic. Product first if your hair is fine or slippery.
Faster than a braid, holds all night, and works for martial, monastic and modern characters alike.
Pull a few pieces loose at the front if you want it to look lived-in rather than severe.
 Save
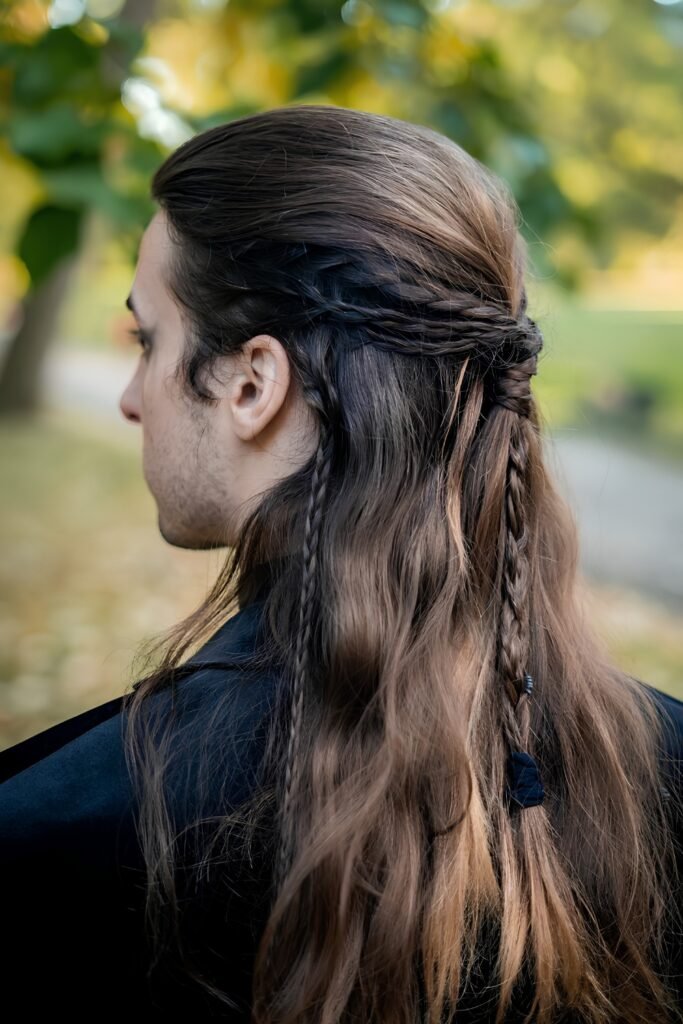
Save9. Half-Up
Technique: take the top section from temple to temple, secure at the crown, leave the rest loose.
The most flattering and least committal option here, and it keeps hair off the face while showing the full length.
Add a small braid into the secured section for a fantasy or historical register.
 Save
SaveTextured and Undone
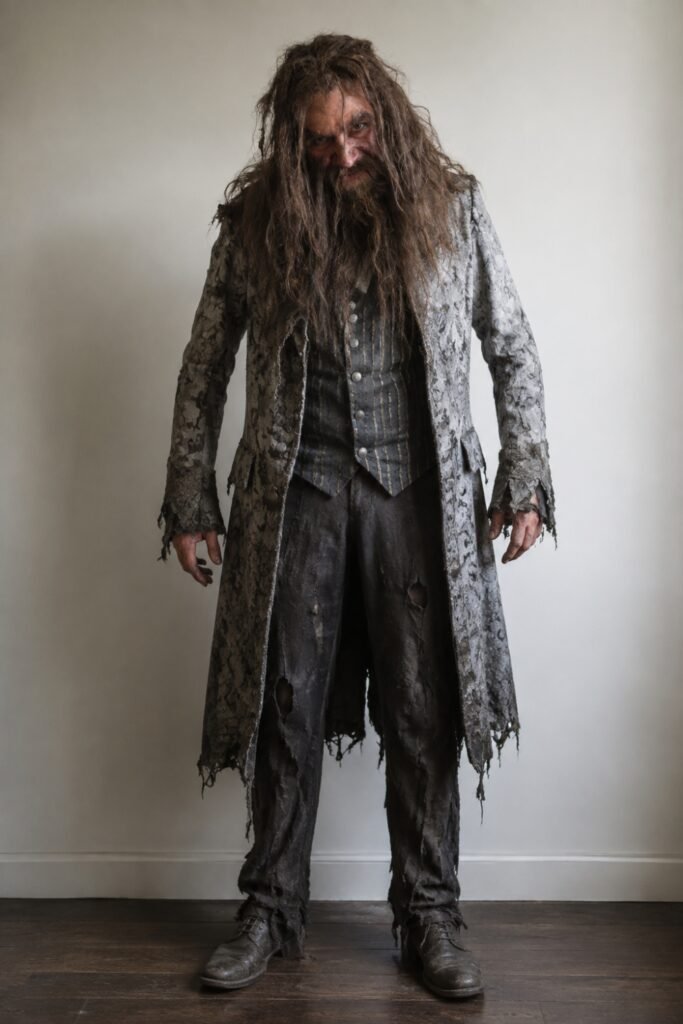
10. Corpse Hair
Technique: starting at the bottom of each section, pinch and pull upward in a teasing motion to create a matted effect. Repeat all over while applying dry shampoo throughout for texture and grip.
This is the technique that makes ghost, zombie and undead costumes work, and it is genuinely specific: teasing from the bottom upward is what creates the matted look rather than simply frizz.
Be prepared for the detangling afterwards. Conditioner and patience, and do not attempt it dry.
 Save
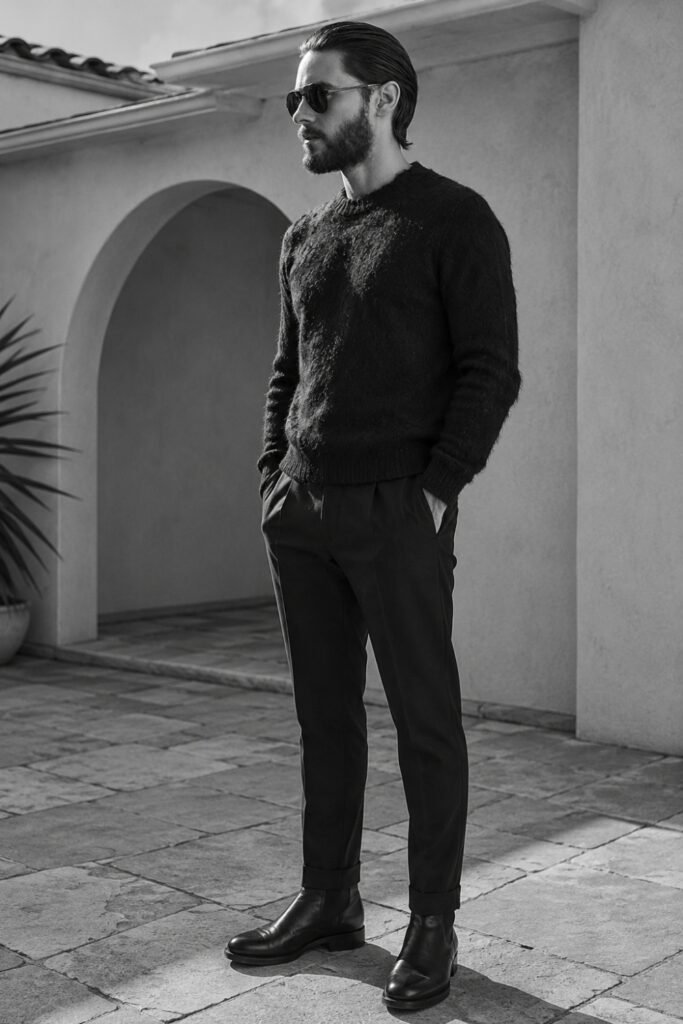
Save11. Wet Look
Technique: work a heavy gel through soaking wet hair and comb it straight back. Do not let it dry naturally into volume; keep it flat.
The opposite of everything else here and useful for vampires, sea creatures, and anything meant to look recently drowned.
It genuinely stays wet-looking all night, which is the appeal and also the drawback if the venue is cold.
 Save
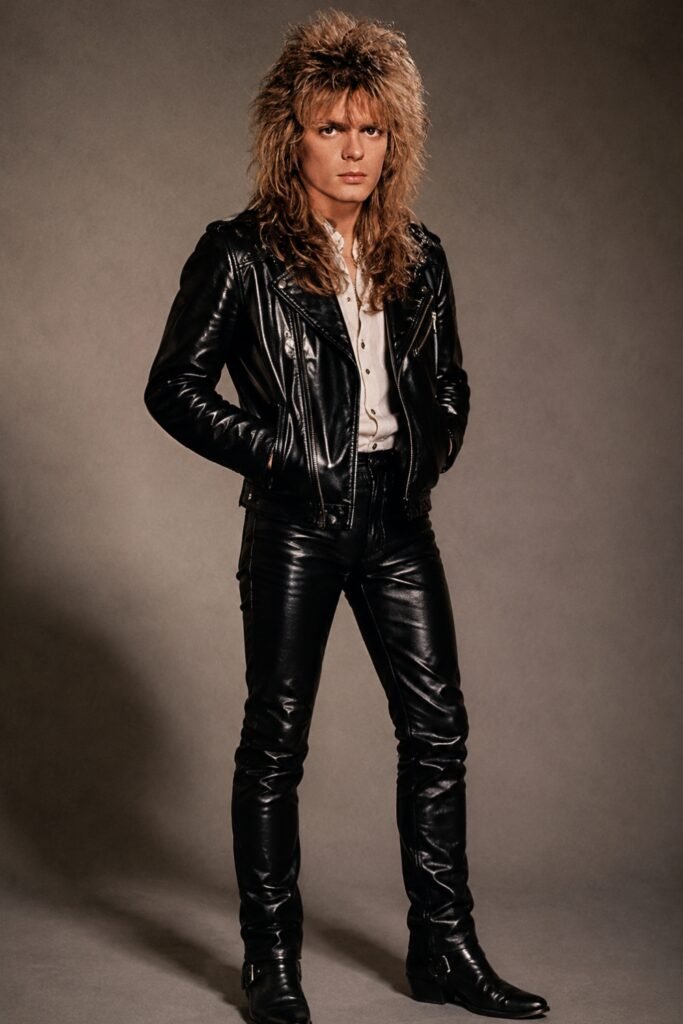
Save12. Big Volume
Technique: mousse at the roots on damp hair, blow-dry with a round brush to amplify volume, then tease gently at the crown for height. Finish with hairspray to lock it.
The eighties rock register, and the sequence matters: volume is built while drying, teasing adds height afterwards, hairspray holds the whole thing.
Hairspray last and generously. This style collapses without it.
 Save
SaveColour
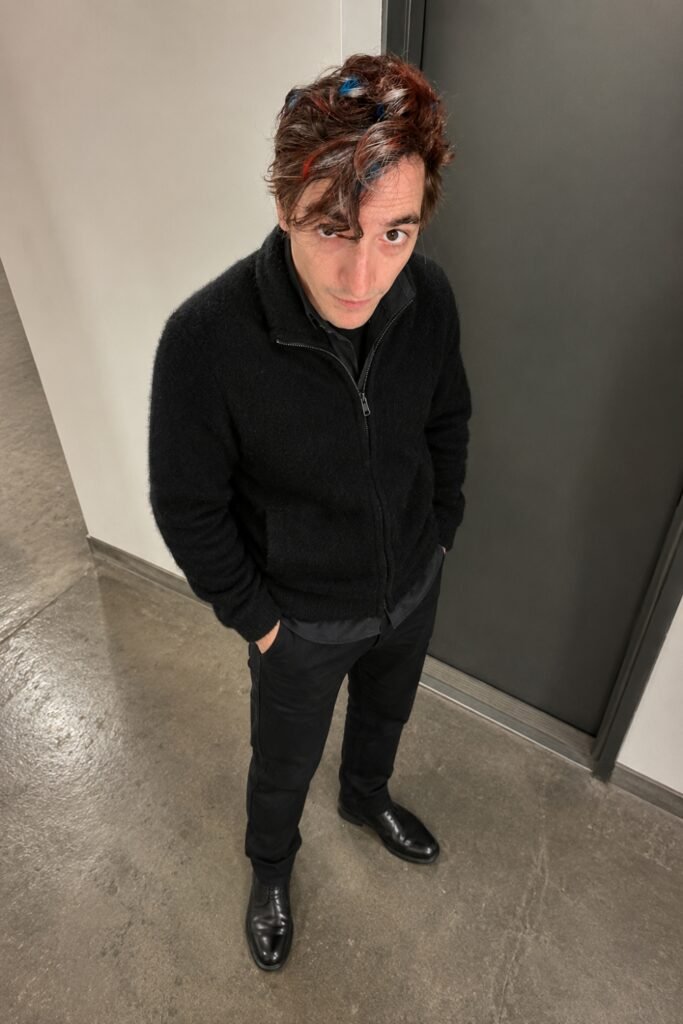
13. Temporary Streaks
Technique: protect your clothing and skin with a towel first. Apply spray, chalk or wax to sections, keeping the rest covered. Let it dry completely before touching anything.
The fastest way to change your look and the easiest to reverse. Streaks read more deliberate than an all-over application and use far less product.
The drying step is the one people skip, and it is why costumes end up with colour transferred all over the collar.
 Save
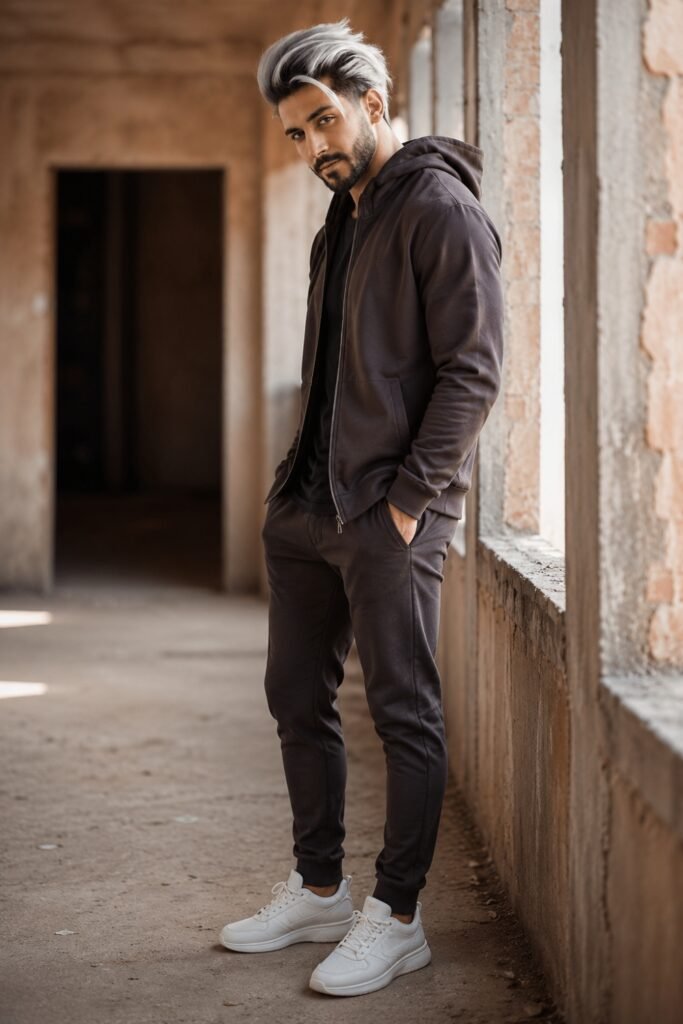
Save14. Full Silver or White
Technique: a colour-depositing conditioner or a full spray application, worked through evenly from roots to ends. Cover clothing thoroughly. Allow to dry completely.
The single highest-impact change available, and it turns most fantasy and historical costumes from approximate to convincing.
Colour-depositing products work best on lighter bases. On dark hair a spray gives better coverage, though it sits on the surface and transfers more readily.
 Save
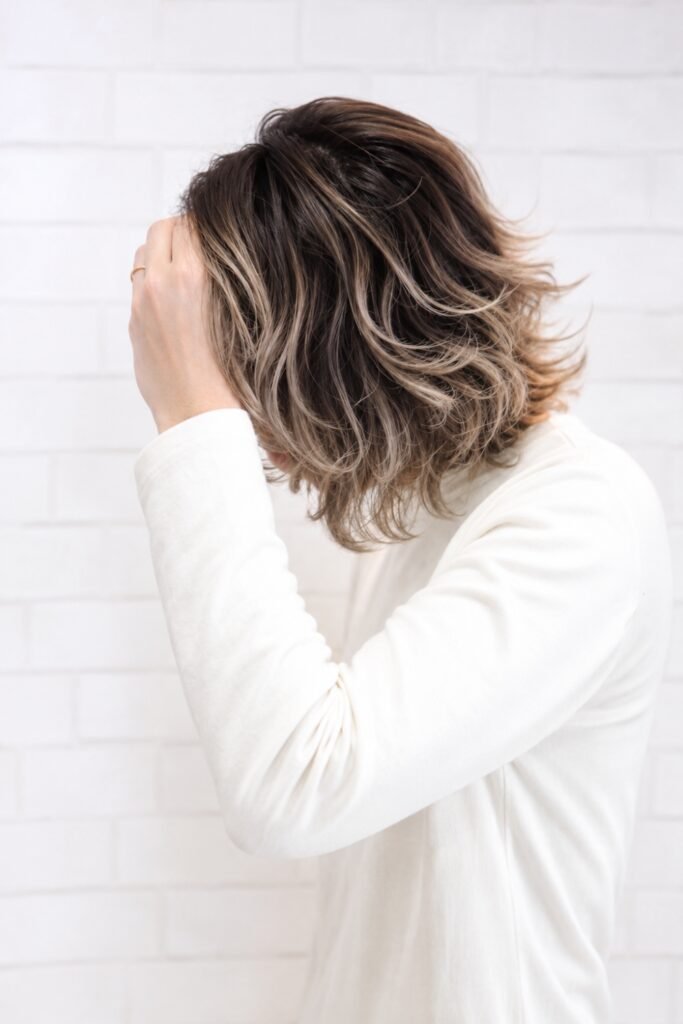
Save15. Gradient Colour
Technique: apply colour only from the mid-lengths down, blending upward with a comb where the two meet so there is no hard line.
More interesting than an all-over application and considerably less product. It also grows out invisibly if anything lingers after washing.
Blend the transition properly. A hard horizontal line reads as a mistake rather than an effect.
 Save
SaveStructural
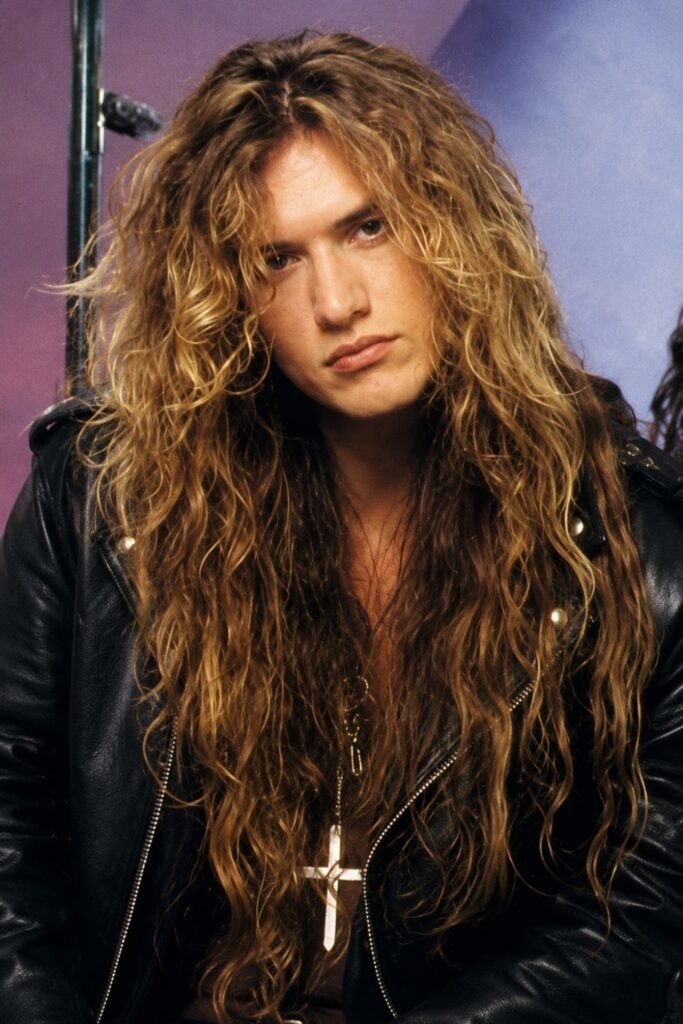
16. Crimped Length
Technique: crimp in sections with a crimping iron on the lowest effective heat, working from the roots down, with heat protectant applied first.
Instantly period-specific and it adds enormous apparent volume without teasing. It also holds for the entire night with no product.
Heat protectant genuinely matters here, since crimping applies direct heat along the full length rather than at the ends.
 Save
Save17. The Concealed Undercut
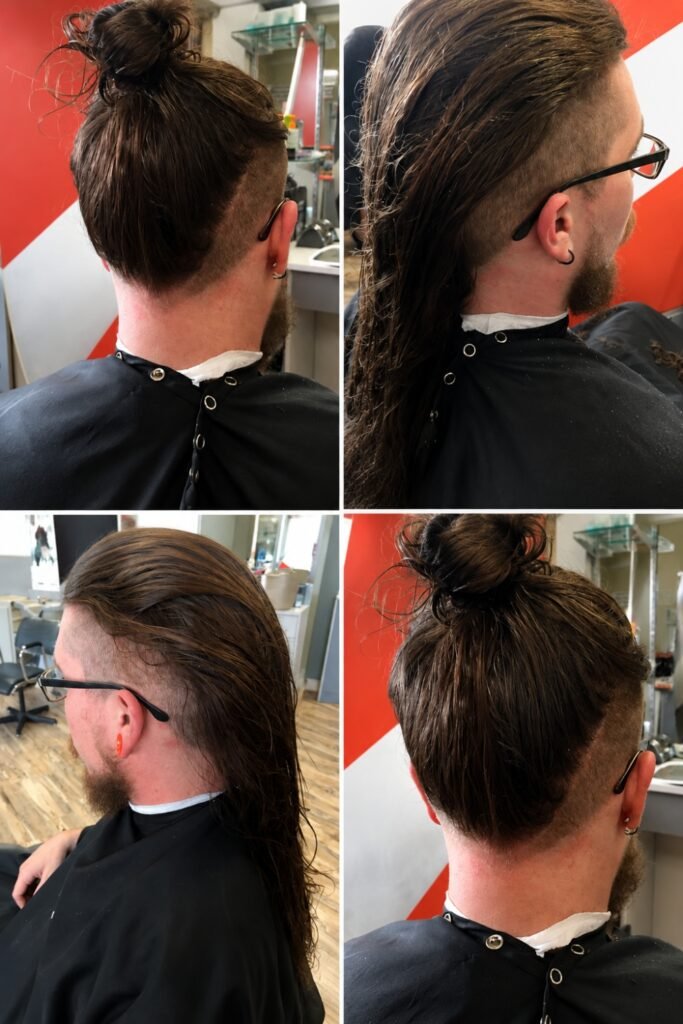
Technique: pin the under-sections flat against the head and let the top layer fall over them, creating the illusion of a shaved or undercut style without cutting anything.
The most useful trick in this article for anyone who wants an edgy character but is not shaving their head in October.
Use plenty of grips and check it from behind before you leave.
 Save
SaveGetting It Out Afterwards
Teased and matted hair needs conditioner and time rather than force. Work from the ends upward with a wide-tooth comb and plenty of conditioner, and expect it to take a while. Pulling at matting from the roots down is how long hair gets damaged.
Temporary colour usually washes out in one or two shampoos, though sprays sitting on the surface of dark hair can take more. Wash it out the same night if you can rather than sleeping in it.
Heavy product, particularly gel and hairspray used together, benefits from a clarifying wash rather than a normal one. Follow it with conditioner, since clarifying strips.
If Your Hair Is Textured
Most of the above assumes straight or wavy hair, which is a limitation of the source material rather than of the styles.
Braids, cornrows and gathered styles all work on textured and coily hair, and in several cases work considerably better, since the texture holds without product. Cornrows in particular give an excellent structural base for historical, fantasy and warrior characters and hold for the whole night without touch-ups.
Cornrows genuinely benefit from a stylist rather than a first attempt at home. Our guide to protective styles for Black hair covers the options and the wash and moisturise routine, and the tension guidance there applies directly to any Halloween styling worn for a long evening.
For braid patterning specifically, including designs that work as a costume element in their own right, our Bo Derek braids guide covers cornrow-based styles across lengths and textures.
Common Questions
How do I stop braids slipping out of long hair?
Grip product before you start. Texture paste, styling gel or pomade worked through the sections enhances grip and reduces slippage, which is the main reason braids loosen on long or slippery hair. Day-old hair also holds better than freshly washed hair.
How do I get the matted corpse look?
Starting at the bottom of each section, pinch and pull upward in a teasing motion, repeating all over while applying dry shampoo throughout for texture and grip. The upward direction is what creates matting rather than frizz, and the dry shampoo is what holds it.
Will temporary hair colour damage my hair?
Temporary sprays, chalks, gels and waxes sit on the surface and wash out, so they are far gentler than permanent colour. Protect your clothing and skin during application, let it dry completely before touching anything, and patch test where the product advises it. Wash it out the same night rather than sleeping in it.
How long does a Dutch braid take?
Longer than you expect on the first attempt, and considerably faster by the third. Practise once before the night rather than learning it at seven o’clock. A single side braid is the fallback if it is not going well.
Can I do these on curly or coily hair?
Yes, and braided and gathered styles often work better, since the texture holds without product. Cornrows give a particularly strong base for historical and fantasy characters and last the whole night. They are worth having done professionally rather than attempted for the first time on Halloween.
Final Thoughts
Pick the style first, then get the product right, because grip is what separates a hairstyle that lasts the night from one that comes apart during the first drink.
And practise anything braided once beforehand. The difference between a good Dutch braid and a bad one is entirely repetition, and Halloween evening is a poor time to find that out.