Looking for cute nail inspiration? Discover 16 adorable ladybug nail art ideas featuring red, black, and creative designs perfect for playful, trendy manicures.
Finding nail art that feels playful yet stylish can sometimes be tricky. Ladybug nail art solves that problem beautifully because it combines cute design with bold color contrast.
The classic red base with black dots instantly stands out while still feeling charming and elegant. It also works well for both simple manicures and more detailed nail art styles.
Some designs stay minimal with tiny ladybug accents, while others create full themed looks with flowers, leaves, or glitter. In this list, you’ll discover 16 lovely ladybug nail art ideas that feel fun, creative, and perfect for your next manicure.
Picnic Ladybugs
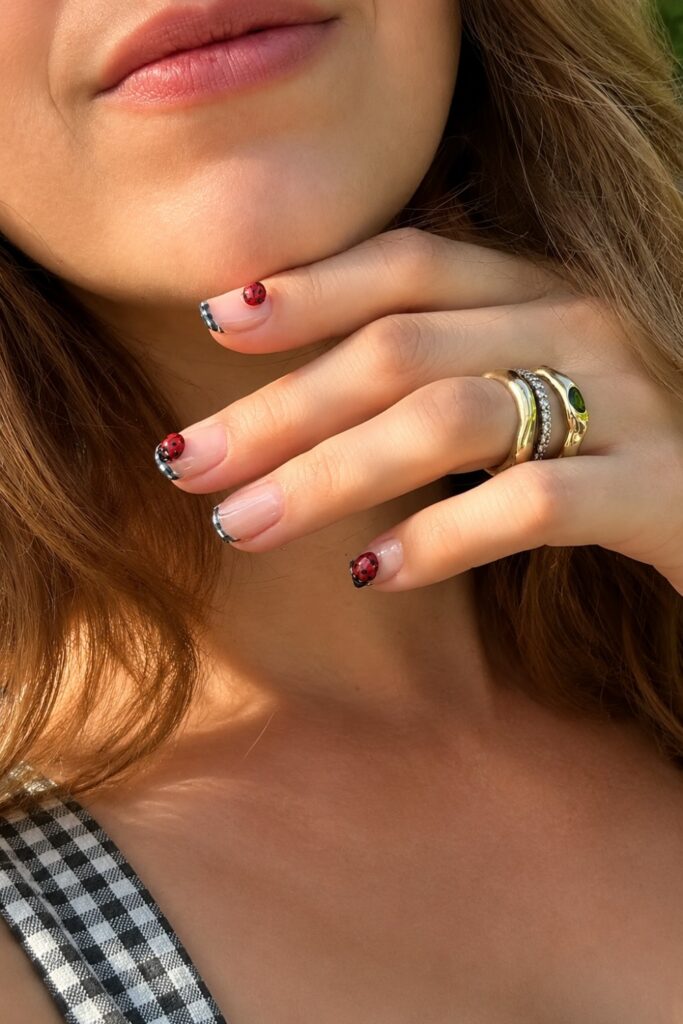
Tiny ladybug details scattered across a warm neutral base capture exactly the right energy for outdoor summer plans. This design perfectly suits picnics, farmers’ markets, and casual weekend gatherings.
Place the bugs at random angles rather than in rows to keep things feeling natural. Seal with a matte top coat so the overall finish feels soft rather than glossy.
 Save
3D Garden Party
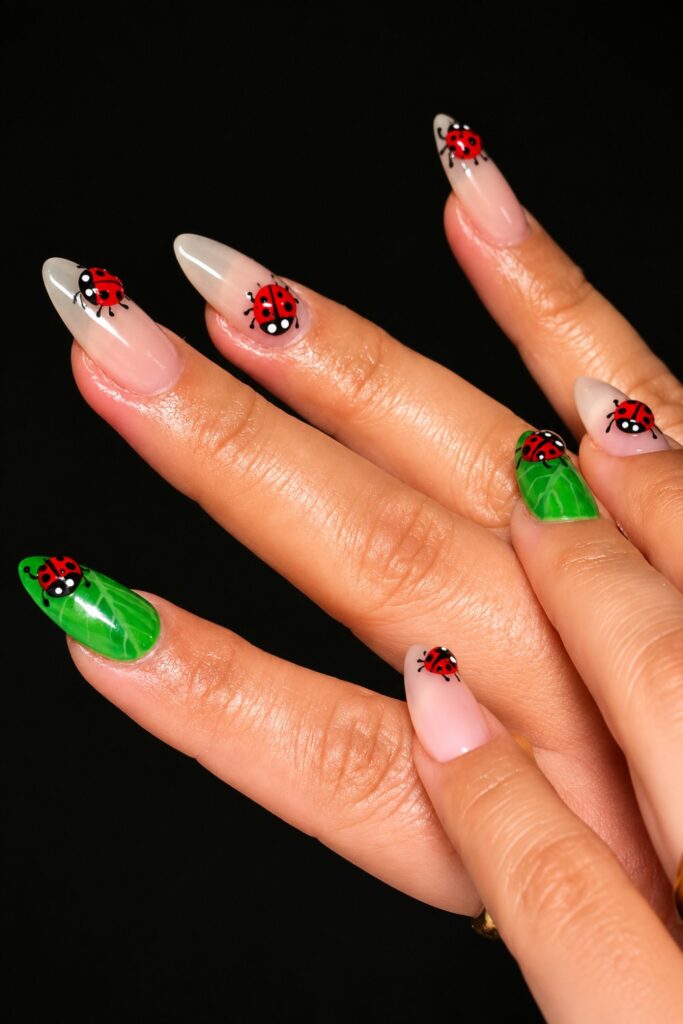
Raised detailing takes nail art into a different category entirely. Small 3D elements in red and black sit above the nail surface, creating actual texture rather than just the illusion of it.
This design suits garden parties and spring celebrations where bold choices are expected. Build dimension using nail art gel and cure each layer separately. Avoid catching the raised pieces on fabric by sealing edges thoroughly with a flexible top coat.
 Save
Ladybugs In The Leaves
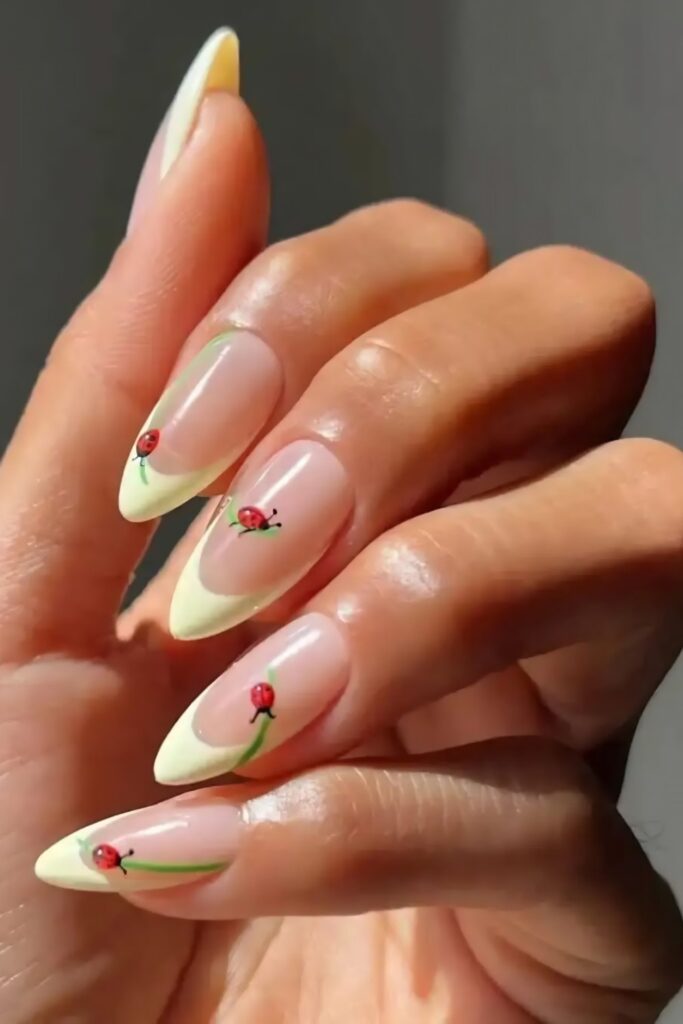
Leaf detailing and ladybug artwork together in a way that feels genuinely cohesive. The leaves provide context for the bugs rather than leaving them floating on a plain base.
A deep forest green works well as the background colour. This suits nature lovers and anyone heading into a botanical garden or outdoor event. Use a fine liner brush for the leaf veins to keep the detailing sharp without overcrowding the nail surface.
 Save
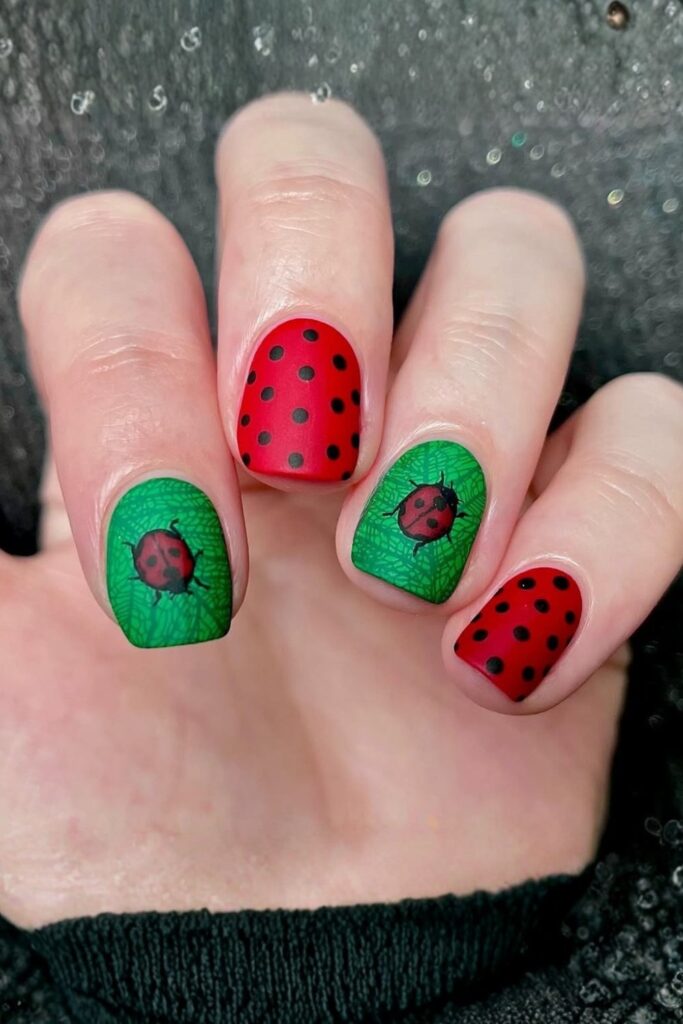
Garden Greens
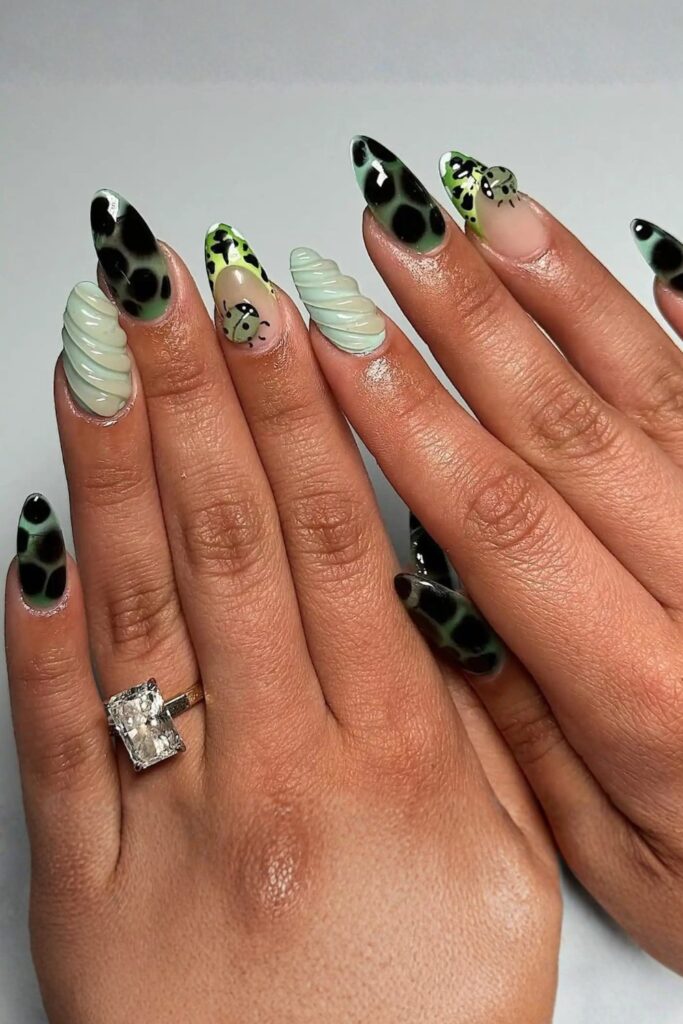
Not every ladybug nail needs a ladybug on every finger. Garden Greens uses lush green tones as the primary statement, with ladybug accents appearing only on one or two nails.
The restraint is what makes it work. Apply the green in two coats for full, even coverage before adding any detailing. A glossy finish makes the colour look fresher and more saturated. This suits spring dressers who want seasonal nails without anything too literal.
 Save
Black And Red Dots
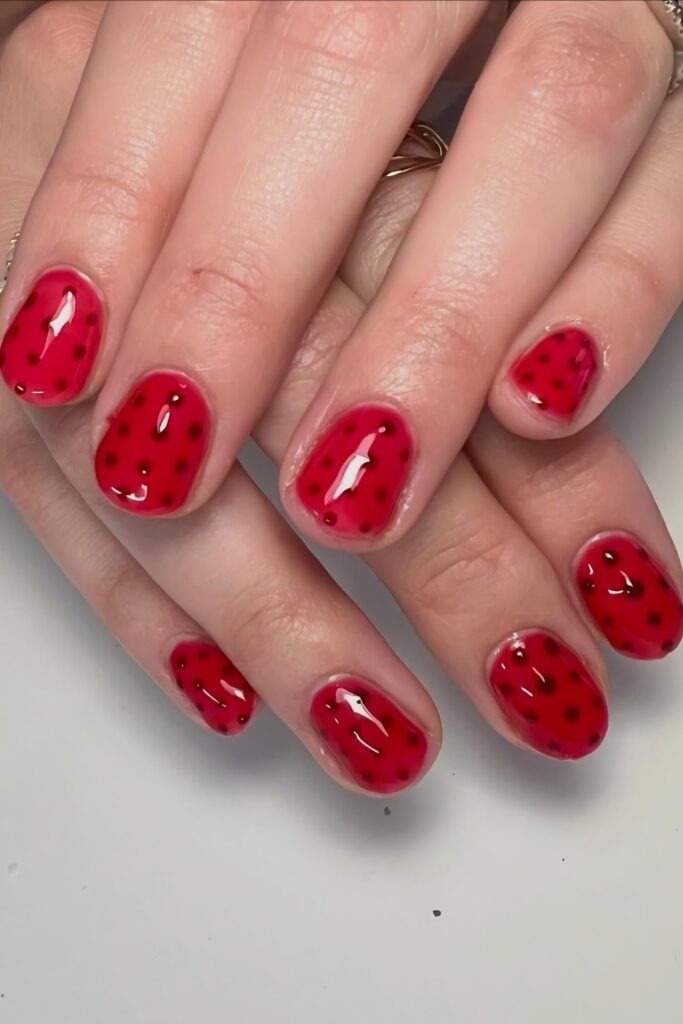
Simple, graphic, and immediately recognisable. A clean red base with evenly spaced black dots is the most stripped-back version of ladybug nail art, and it holds up without any additional detailing.
The boldness suits confident dressers who prefer impact over intricacy. Use a medium dotting tool loaded consistently for uniform dot sizing across all nails. Wipe the tool between each application to prevent build-up that creates uneven shapes.
 Save
Army Green In Matte
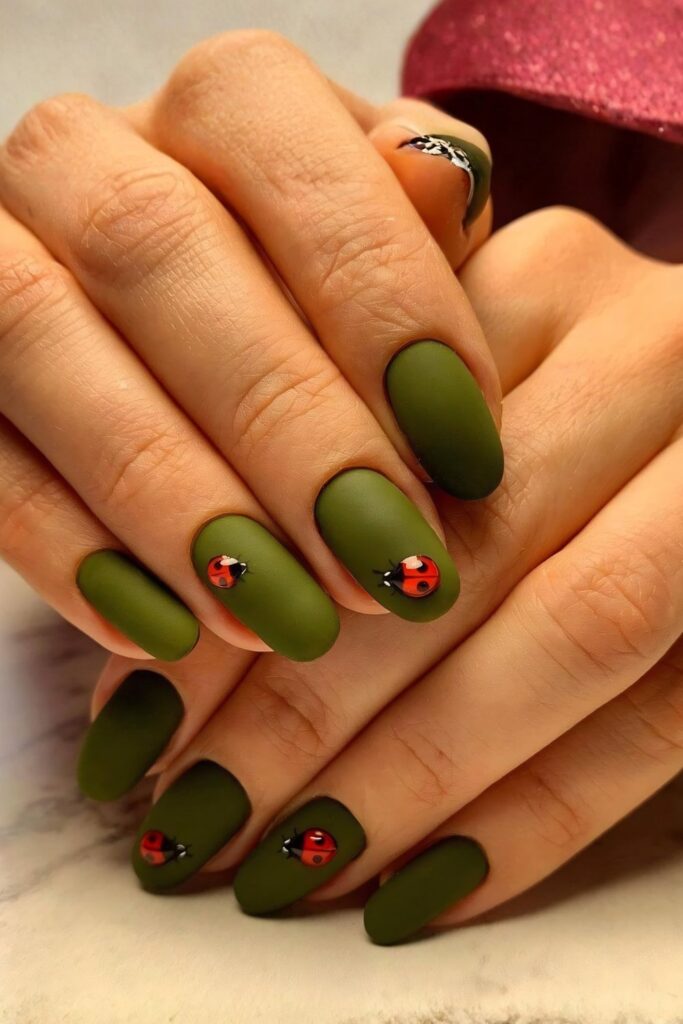
Matte army green is not an obvious ladybug choice, which is exactly why it works. The flat finish gives the colour a raw, utilitarian quality that makes any red detailing on top read sharper by contrast.
Add small ladybug stamps on two accent nails only. This suits autumn dressing and creative workplaces. Use a matte top coat applied in one slow, even stroke to avoid streaking across the surface.
 Save
Ombre Ladybug Nail
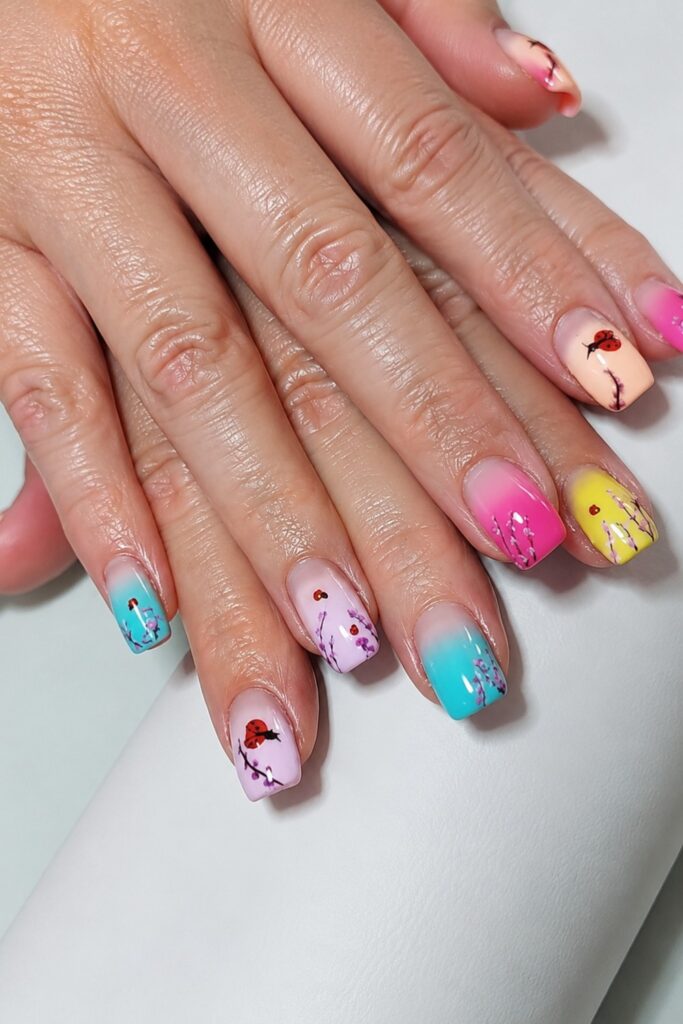
Red fading into soft pink or deep burgundy creates a gradient that still reads ladybug without being too literal. The ombre does the heavy lifting while small black dot details reinforce the theme.
Dab colour transitions using a torn sponge edge while the polish is still slightly wet. Blend quickly before layers set. This suits evening plans and anyone who wants seasonal nail art with a more polished, grown-up finish.
 Save
Lady Beetle In Neon Pink
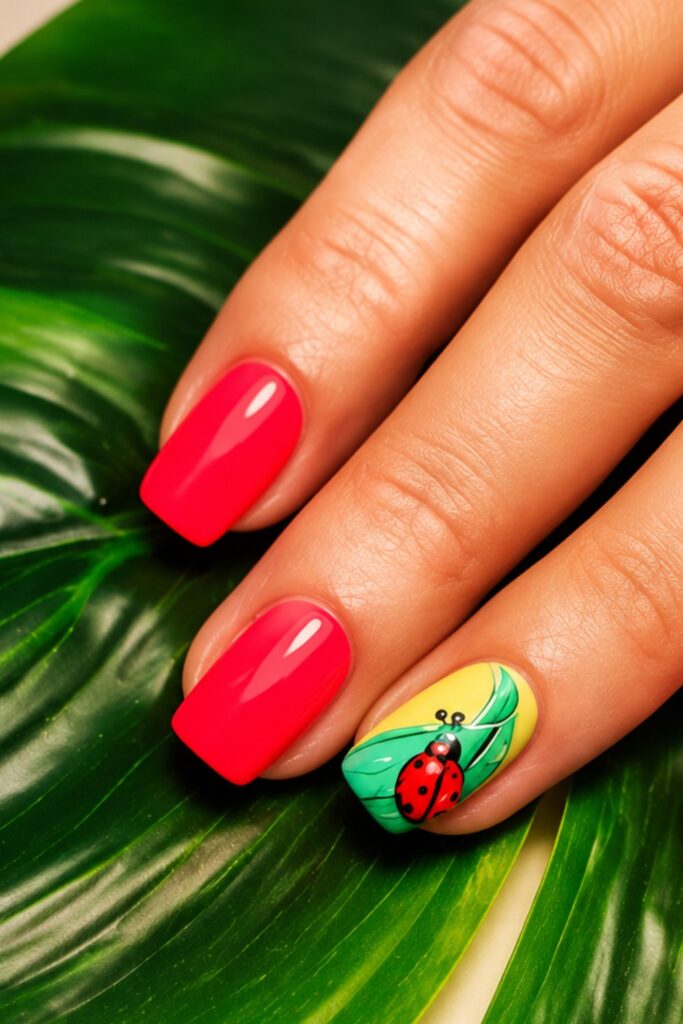
Swapping traditional red for neon pink repositions the ladybug theme entirely. It reads playful and current rather than seasonal or themed. The neon base needs a white underlayer to hit full brightness on the nail.
Apply white first and let it cure completely before adding colour. This suits festival dressing, summer holidays, and anyone who finds classic red ladybug nails too expected. Finish with a glossy seal coat to intensify the neon saturation.
 Save
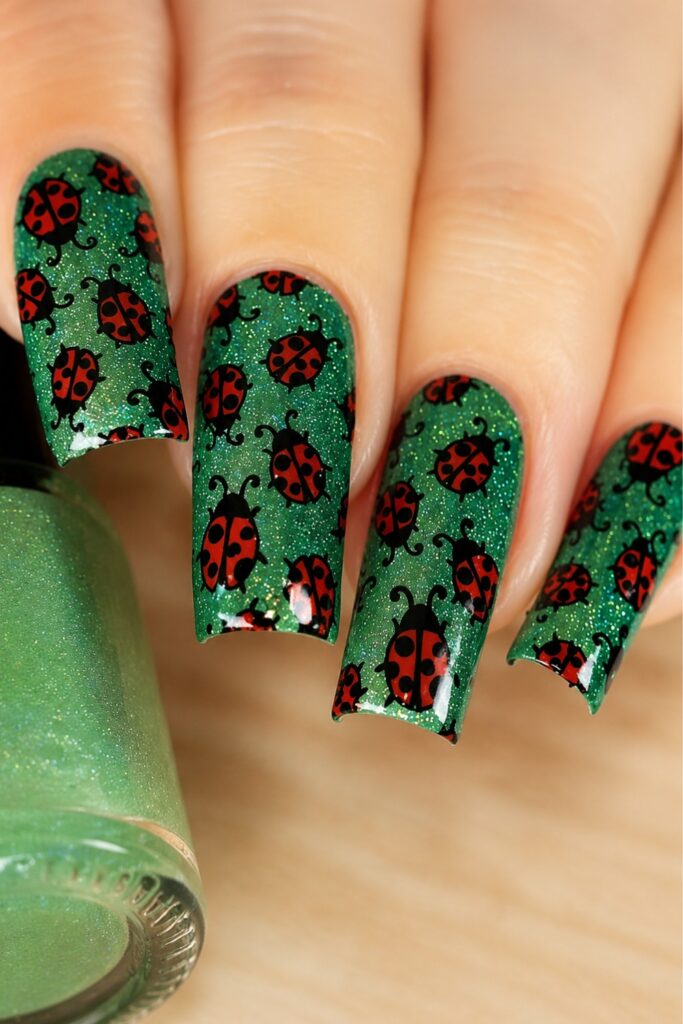
Glitters On the Green Base
Green glitter as a base layer creates a foundation that already has personality before any ladybug detail is added. Scattered red and black accents on top complete the theme without overwhelming the sparkle underneath.
Apply glitter polish in dabbing motions rather than strokes to build density evenly. This suits festive occasions and party settings where nails are likely to be noticed under decorative lighting.
 Save
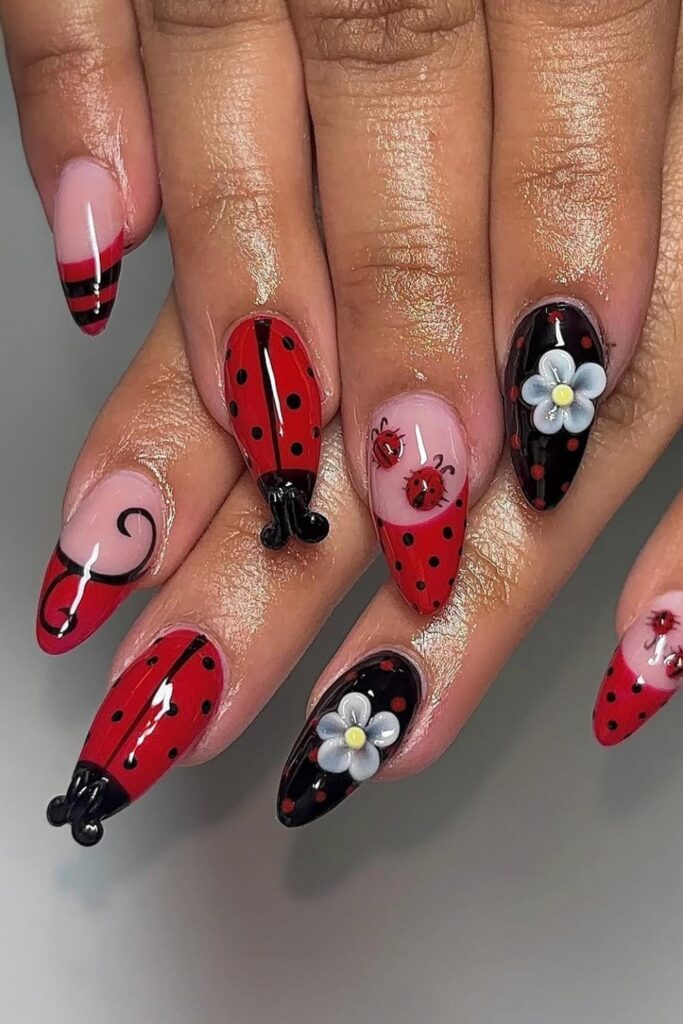
Bright Red Polish And Closed-Up Ladybugs
Full coverage red with detailed, close-up ladybug art on accent nails creates a strong contrast between simplicity and intricacy. The plain red fingers give the detailed nails room to breathe.
Paint the ladybug bodies using a small round brush for clean, controlled shapes. This suits summer weddings and outdoor celebrations. The detailed accent nails tend to hide wear better and can go longer between touch-ups.
 Save
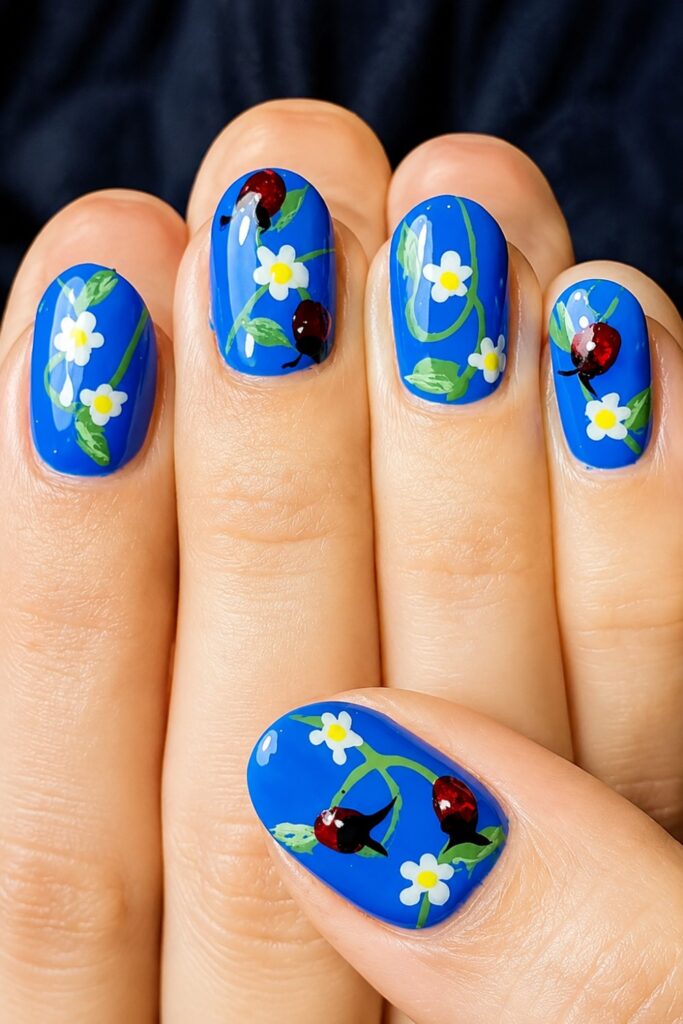
Ladybugs In Blue Polish
Blue completely reframes the ladybug concept. A cornflower or cobalt base with traditional black-spotted red ladybug stamps creates an unexpected colour clash that feels fresh rather than jarring.
This suits creative professionals and anyone bored with conventional seasonal nail choices. Use a stamping plate for consistent ladybug shapes across multiple nails. Apply stamping polish in one firm press rather than rocking the plate, which smears the detail.
 Save
Ladybug Stamps On Green Glittered Polish
Stamping over a glittered base requires a slightly heavier hand than stamping over plain polish. The texture beneath affects how cleanly the stamp transfers.
Use an opaque stamping polish in red or white to cut through the glitter surface. This suits nature-themed events and spring celebrations. Allow the glitter base to dry completely before attempting any stamping.
 Save
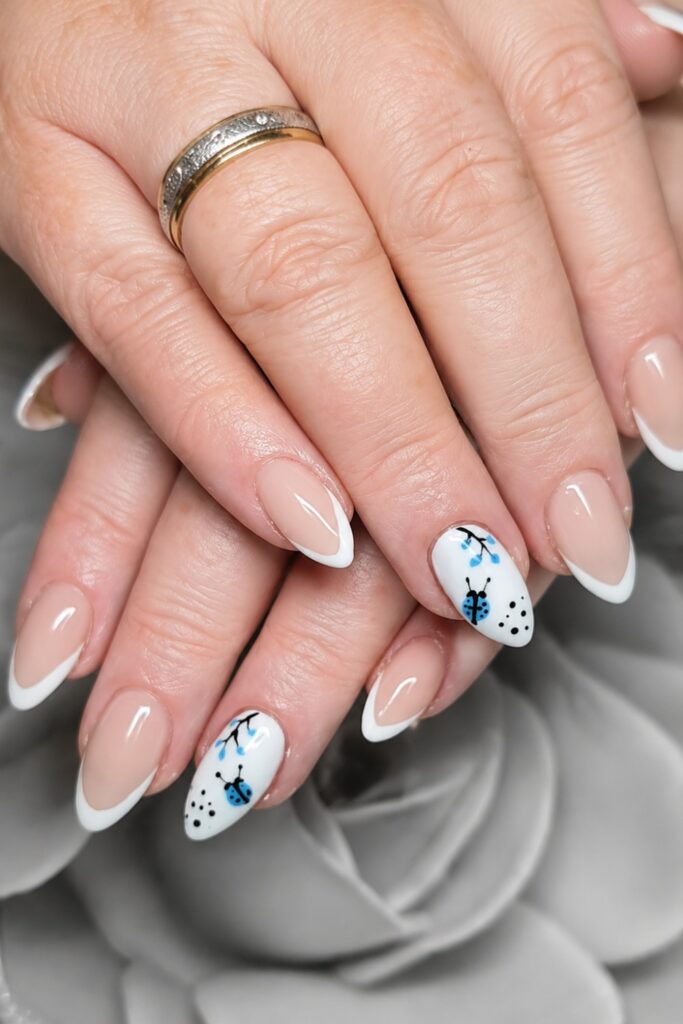
Blue Ladybug In A Clean White
White as a base colour makes everything placed on top look intentional. A blue ladybug against clean white reads graphic and considered rather than decorative.
The contrast is sharp without being harsh. This suits minimalist dressers who want nail art that feels curated. Keep the white base streak-free by applying thin coats with a steady hand.
 Save
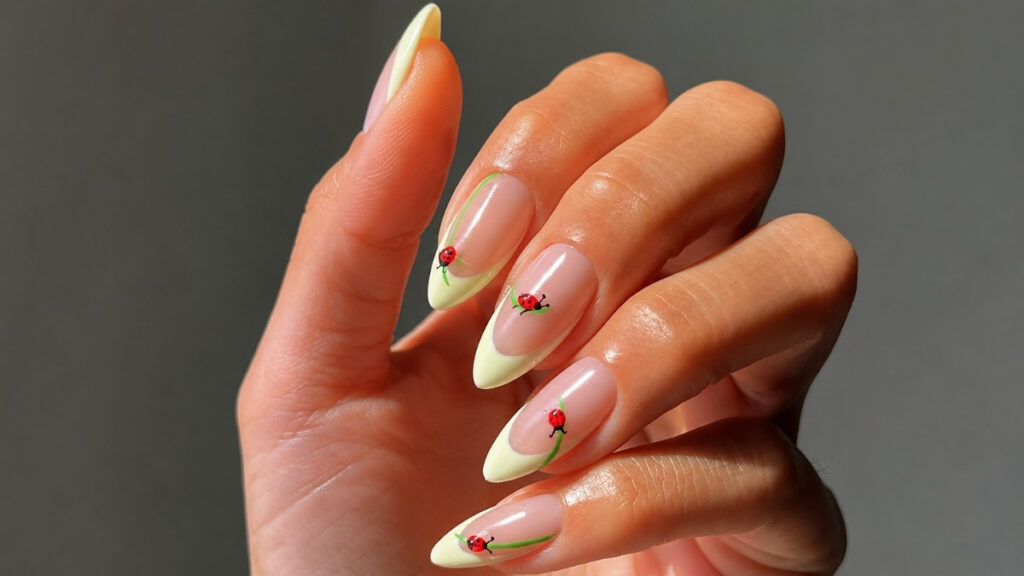
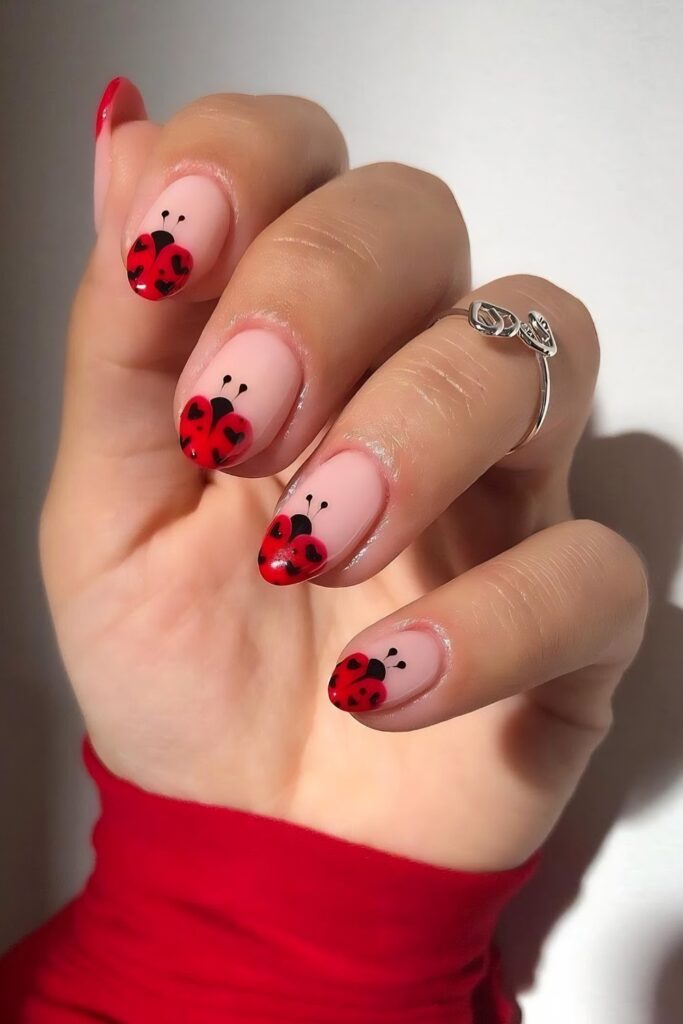
Ladybug-Inspired French Tips
French tips reimagined with ladybug detailing at the smile line bring a familiar format into seasonal territory. Tiny spots and red curved tips replace the traditional white edge.
The rest of the nail stays natural or nude, keeping the focus on the tip. This suits workplace settings where full nail art feels too bold. Use nail guides for a clean, curved line before adding spot detailing with a fine dotting tool.
 Save
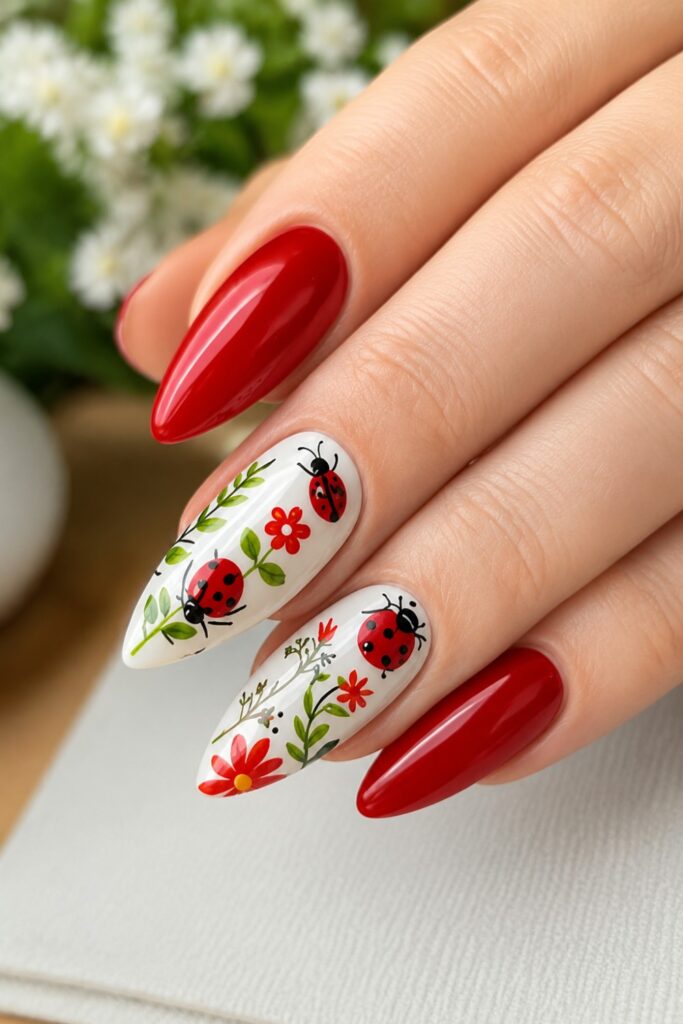
Ladybug And Leaf Stamps
Combining two stamps on one nail requires planning before the first press. Map out placement mentally so the ladybug and leaf sit in relationship to each other rather than competing for space.
A cream or pale green base gives both stamps enough contrast to read clearly. Clean the stamp plate between each colour to prevent muddying the red ladybug detail with leftover green leaf polish.
 Save
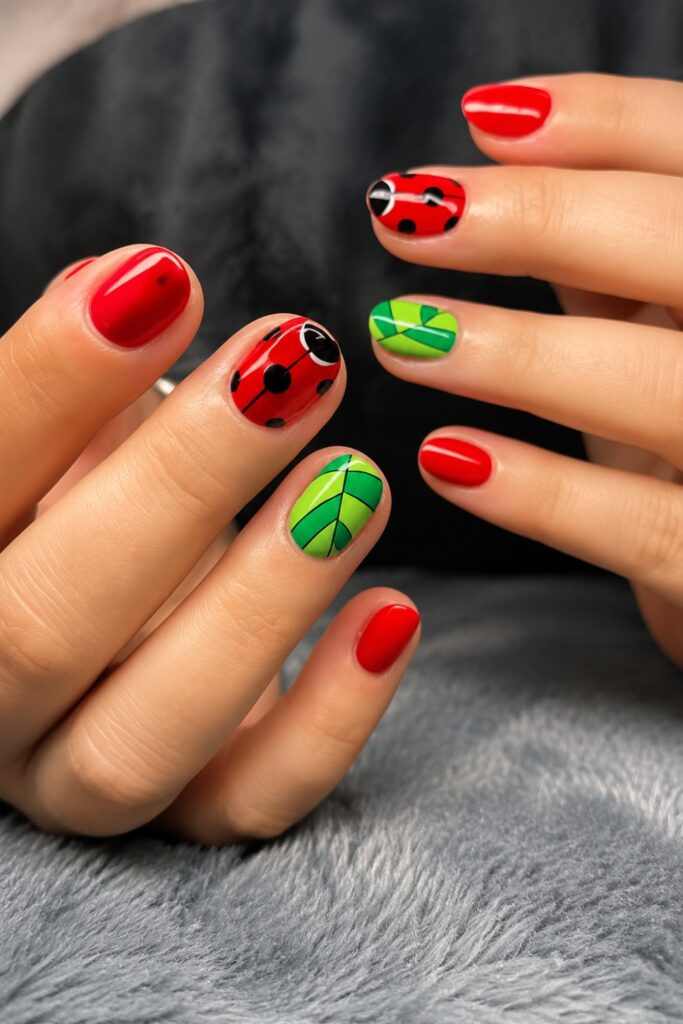
Geometric Nail Art
Ladybug geometry replaces organic shapes with clean lines and structured forms. Hexagons, triangles, and sharp dot grids in red, black, and white create a modern interpretation of the theme that feels more architectural than illustrative.
This suits fashion-forward dressers and urban settings where literal nail art would feel out of place. Use striping tape to mask clean edges before flooding colour into each section. Remove tape while polish is still slightly tacky for the sharpest lines.
 Save
Conclusion
Ladybug nail art proves that playful designs can still feel stylish and expressive. Among these ideas, Ladybug-Inspired French Tips, Ombre Ladybug Nails, and Ladybugs in the Leaves stand out for their creativity and balance. Each offers a unique twist while keeping the iconic red and black charm. Choosing one of these designs can instantly turn a simple manicure into a cheerful conversation starter.
For more ideas, see our quick and easy halloween costume ideas for last-minute plans, halloween costumes for women to embrace the spooky spirit and christmas outfit ideas for kids to try this christmas.
Frequently Asked Questions
1. What colors are best for ladybug nail art?
The most popular colors are bright red, black, and white. Some designs also include green for leaves or glitter accents to create a more decorative and eye-catching manicure.
2. Is ladybug nail art suitable for short nails?
Yes, ladybug nail art works very well on short nails. Simple dot patterns or small ladybug accents look cute and neat even on shorter nail lengths.
3. Can beginners try ladybug nail art at home?
Yes, beginners can create simple ladybug designs using dotting tools or toothpicks. Start with a red base, add black dots, and draw a small ladybug for an easy design.
4. When is ladybug nail art most popular?
Ladybug nail art is especially popular in spring and summer because the bright colors and nature-inspired theme match the cheerful seasonal aesthetic.