Medium hair is the worst length for hiking, and it is worth being honest about why.
It is long enough to tie up, which makes you assume a ponytail will solve it. Then the layers work their way out over the first climb, the elastic slides down, and by the second hour you are re-doing it at every switchback. Hairdressers call this shingling, and it is the specific failure that shoulder-length hair produces.
Then there is the second problem, which nobody writes about at all. A ponytail at this length lands exactly where your backpack strap sits. It rubs, it gets caught, and it pushes the hair forward over your shoulder every time you adjust the pack.
Both problems have the same solution, and it is not a better elastic. It is anchoring the hair into itself, and putting it somewhere the strap is not.
Anchor It, Do Not Just Gather It
An elastic holds the hair it can reach. Layers shorter than the gathering point are not held by anything, which is why they escape.
Anchoring means weaving the shorter pieces into the style itself so they are held along their length rather than at one point. A Dutch braid does this by taking hair in from the scalp as it travels, which secures layers that a ponytail would leave loose. Twisting and pinning does it too, on a smaller scale.
If you would rather keep a ponytail, the multi-elastic version solves the same problem differently. Additional elastics every few inches down the length create multiple points of contact instead of one, so nothing has a clear route out.
Clear the Strap Zone
Work out where your pack strap sits before you choose a style. For most people a mid-height ponytail lands directly on it.
The three positions that avoid it are high on the crown, low at the nape underneath the strap, or split into two low sections that sit either side. A single mid-height ponytail is the one to avoid, which is unfortunately the default most people reach for.
One more thing on accessories. A headband worn too tightly around the forehead restricts circulation, causes headaches, and over time can contribute to hair loss at the hairline. If you can feel it after twenty minutes, it is too tight.
Braided and Anchored
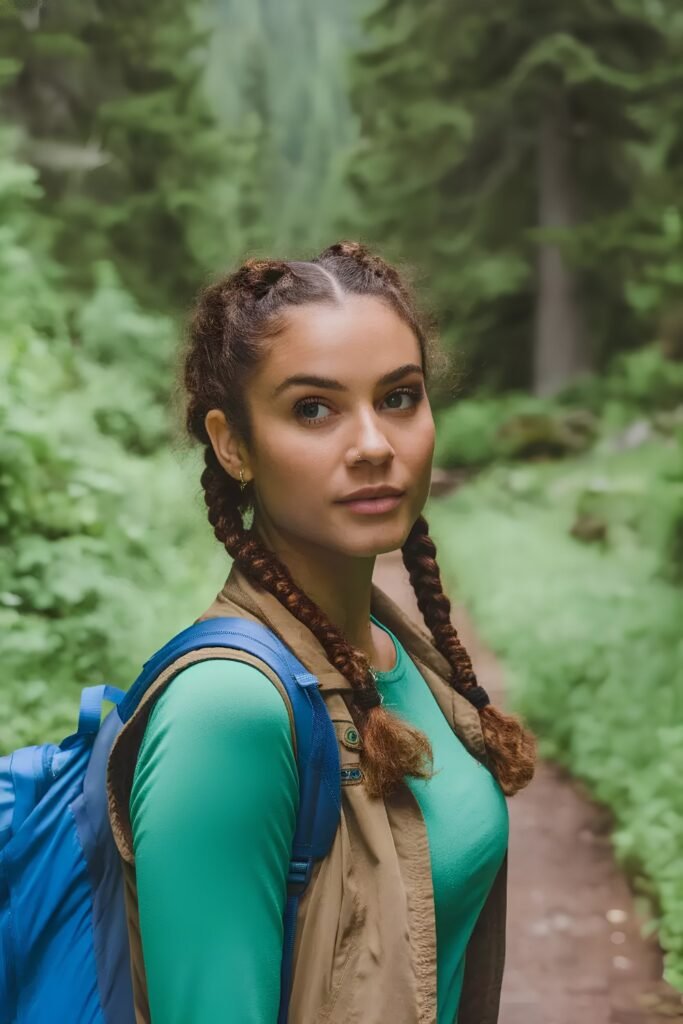
1. Double Dutch Braids
Two Dutch braids, one either side, weaving hair in from the scalp along their full length.
The gold standard for this length, because the technique specifically anchors layers that would otherwise slip out of a ponytail. It also splits the weight into two sections that sit naturally either side of a pack strap rather than on top of it.
They hold overnight too, which makes them a genuine option for a multi-day trip rather than just a day hike.
 Save
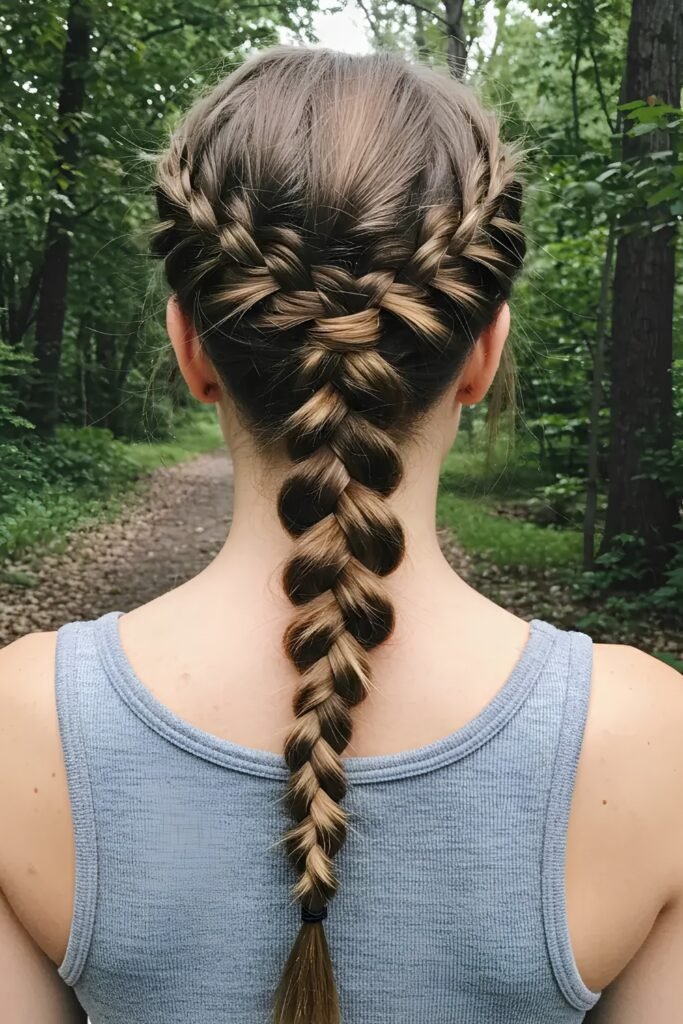
Save2. Single Dutch Braid
One Dutch braid down the centre back, taken from the hairline to the nape and secured.
Faster than two and easier to do on yourself, which matters if you are braiding at a trailhead without a mirror. The centre position also sits between most pack straps rather than under either one.
The first three passes are the ones that matter. Take small sections at the crown and the rest holds far better.
 Save
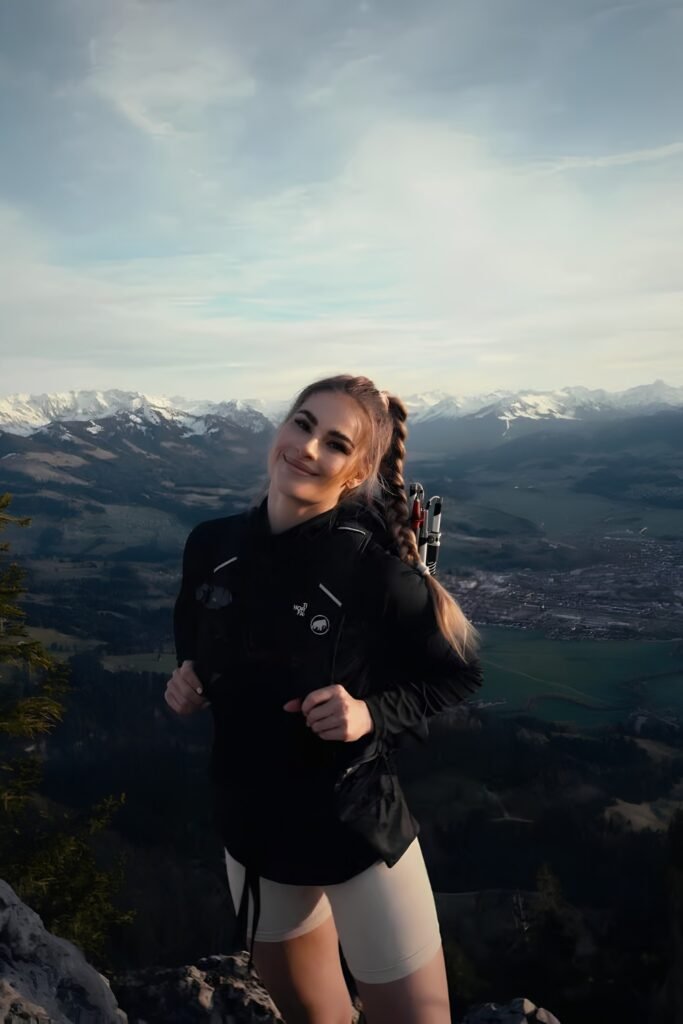
Save3. Dutch Braid Into a Ponytail
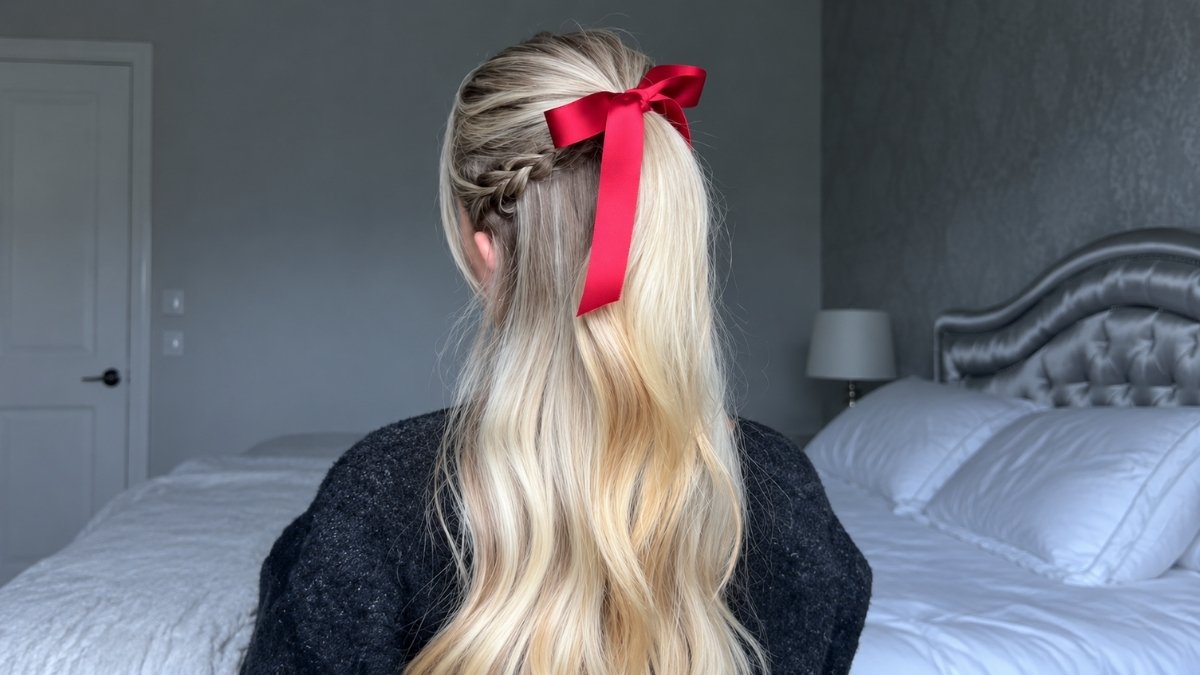
The top section Dutch braided from the forehead to the crown, then everything gathered into a ponytail below.
The best combination for anyone whose front layers are the actual problem. The braided section holds the short pieces at the top, and the ponytail handles the length without needing to reach them.
Position the ponytail high or low rather than in the middle, for the strap reasons above.
 Save
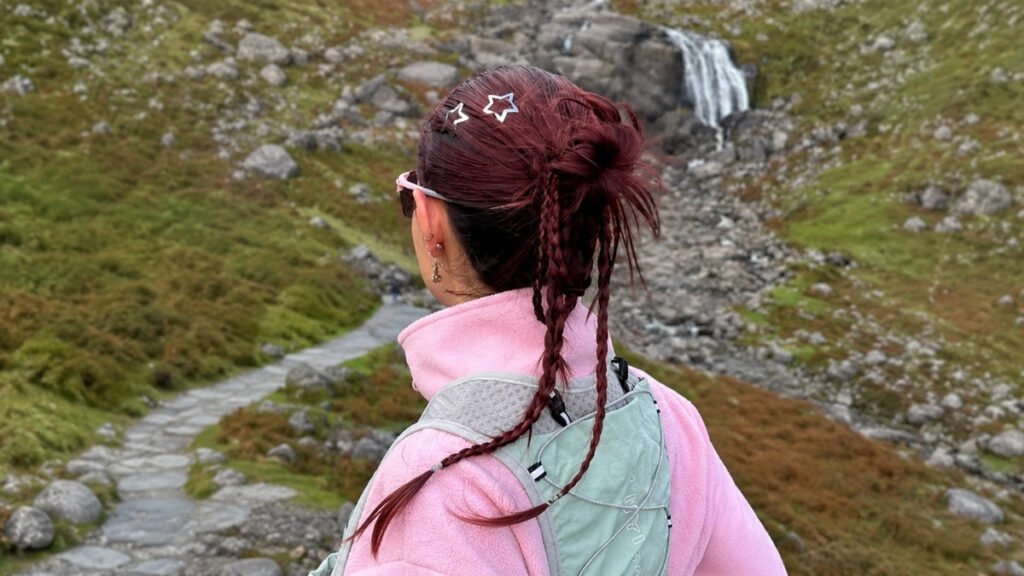
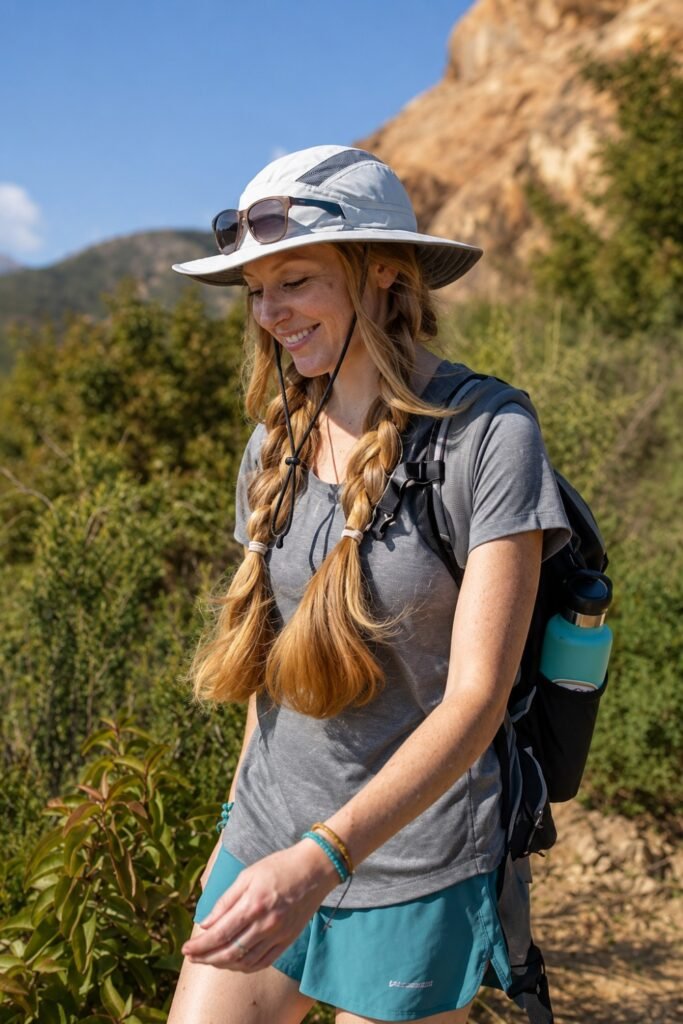
Save4. Low Braided Pigtails
Two low braids sitting behind the ears, below where a brimmed hat sits and either side of a pack strap.
This is what experienced hikers at this length tend to settle on. The low position is comfortable under a hat, the two sections clear the strap, and braiding rather than tying stops the layers escaping.
Also the most comfortable option for sleeping in, if you are camping and want to keep the style overnight.
 Save
Save5. Crown Braid With Loose Length
A braid taken around the crown like a headband, with the remaining length left down or gathered separately.
The functional version of a decorative style. A crown braid holds the front sections and the flyaways firmly enough that you do not need a headband, which removes the tightness problem entirely.
Takes practice to do on yourself. Worth learning at home rather than attempting it at the trailhead.
 Save
SavePonytails That Hold
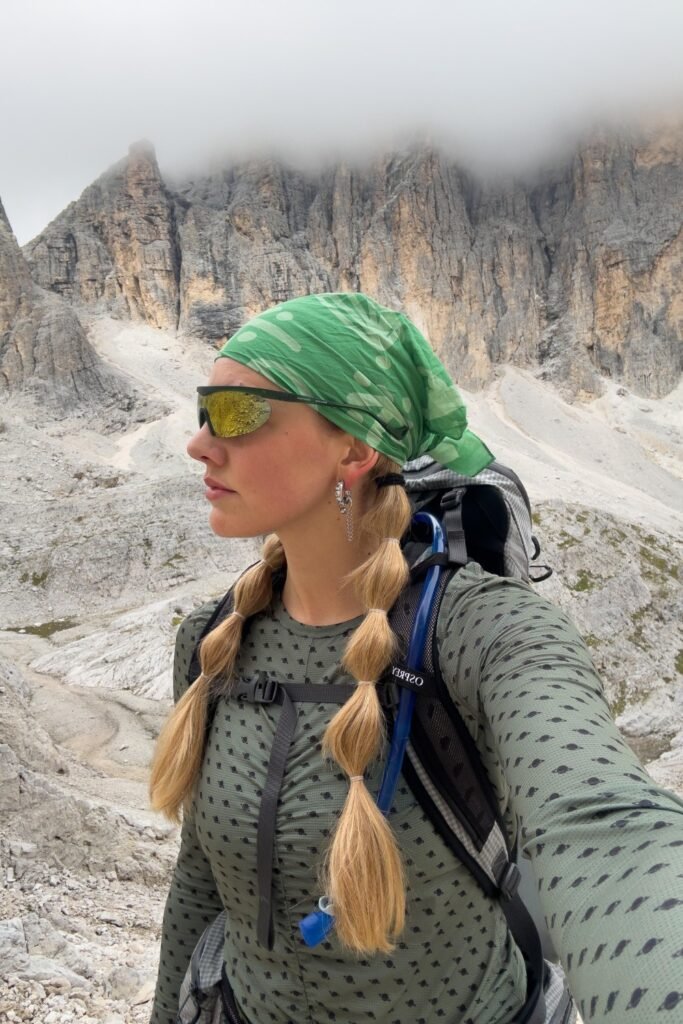
6. Multi-Elastic Ponytail
A high ponytail with additional elastics placed every few inches down the length.
The direct fix for shingling. Multiple contact points mean the layers have nowhere to escape to, and the style keeps its shape through several hours of movement.
There is a practical redundancy here as well: if one elastic snaps on the trail, the rest hold everything until you reach your pack.
 Save
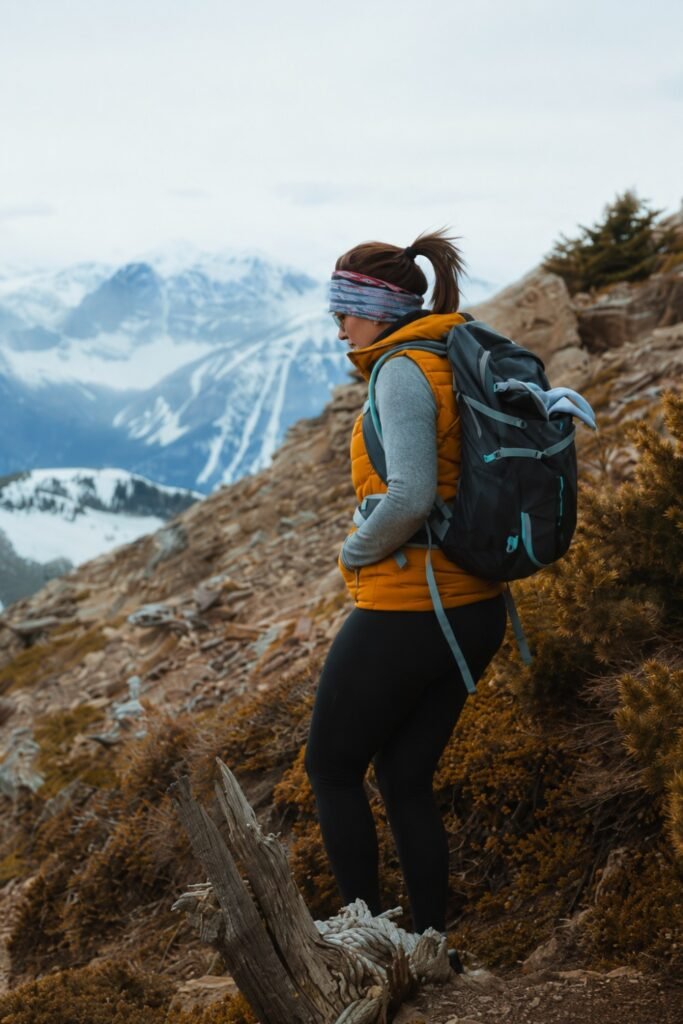
Save7. High Crown Ponytail
A ponytail positioned high on the crown, well clear of the strap line.
The highest position is the one most likely to survive a full day, because the pack cannot reach it and gravity works with the elastic rather than against it.
It does not sit well under most caps. If you are wearing a hat, choose one with a ponytail port or move to a low style instead.
 Save
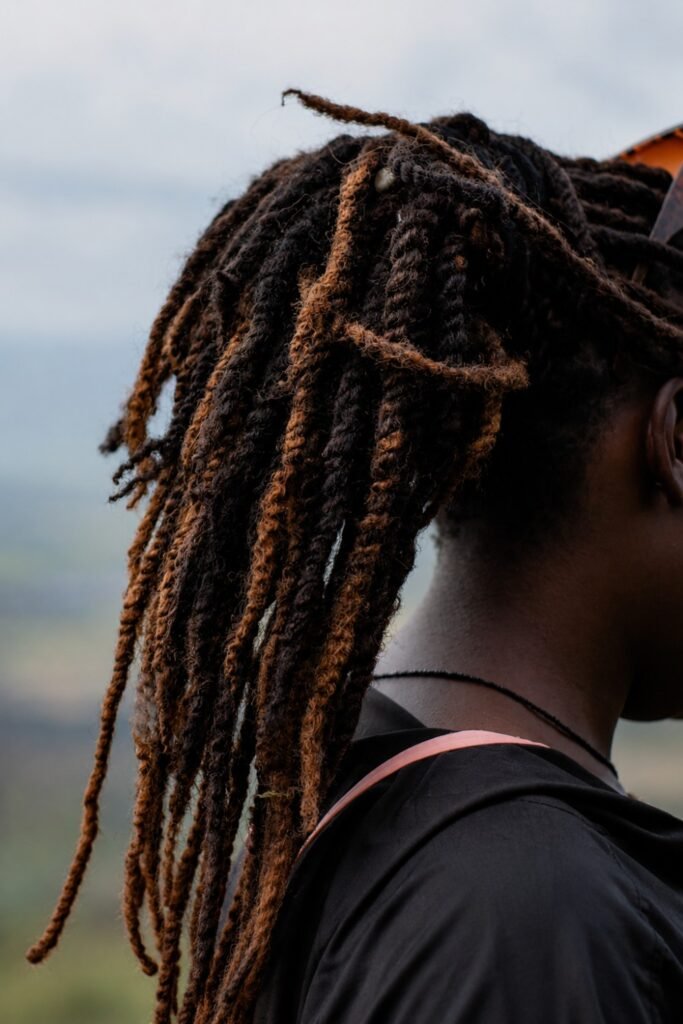
Save8. Low Nape Ponytail Under the Strap
A ponytail gathered low at the nape, sitting underneath the pack strap rather than against it.
Asia Bright, CEO and founder of Black Girls Hike, uses a low ponytail on her shoulder-length locs to keep her hair from collecting branches and bugs. She also makes the point that a thicker tie holds them better, which applies to any medium-length hair with weight to it.
The low position also sits comfortably under a brimmed hat, which the high version does not.
 Save
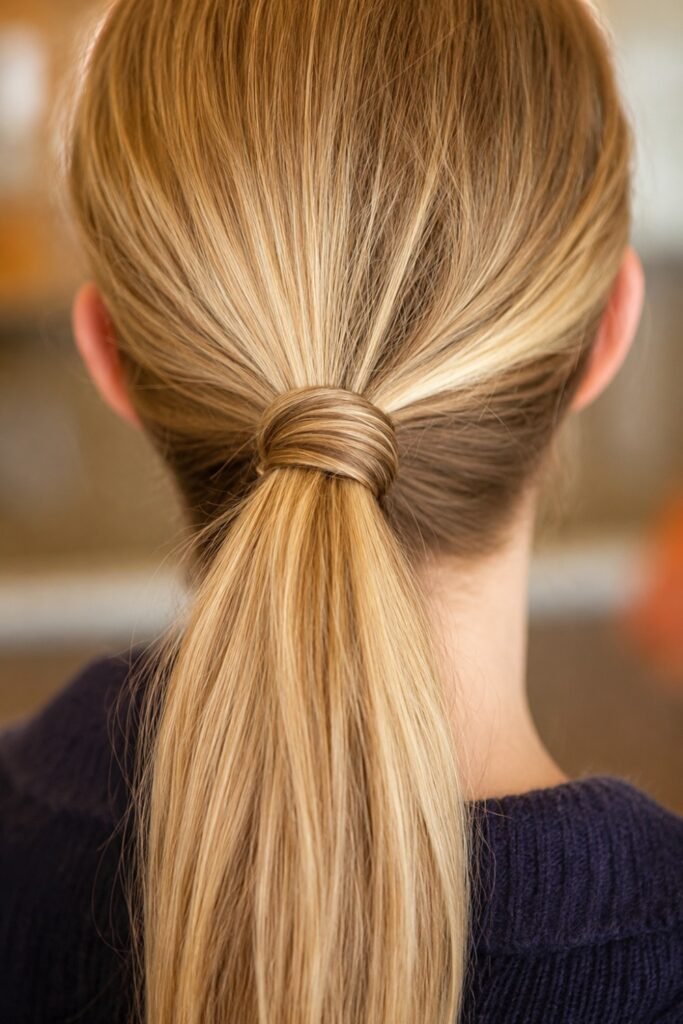
Save9. Wrapped Ponytail
A low or high ponytail with a section of hair wrapped around the base to conceal and reinforce the elastic.
The wrap adds a second layer of grip at the point where ponytails usually fail. It also keeps the elastic away from your scalp, which reduces the pulling that causes tension headaches on a long day.
Secure the wrap with a small pin rather than tucking it. Tucking does not survive wind.
 Save
SaveBuns and Contained Styles
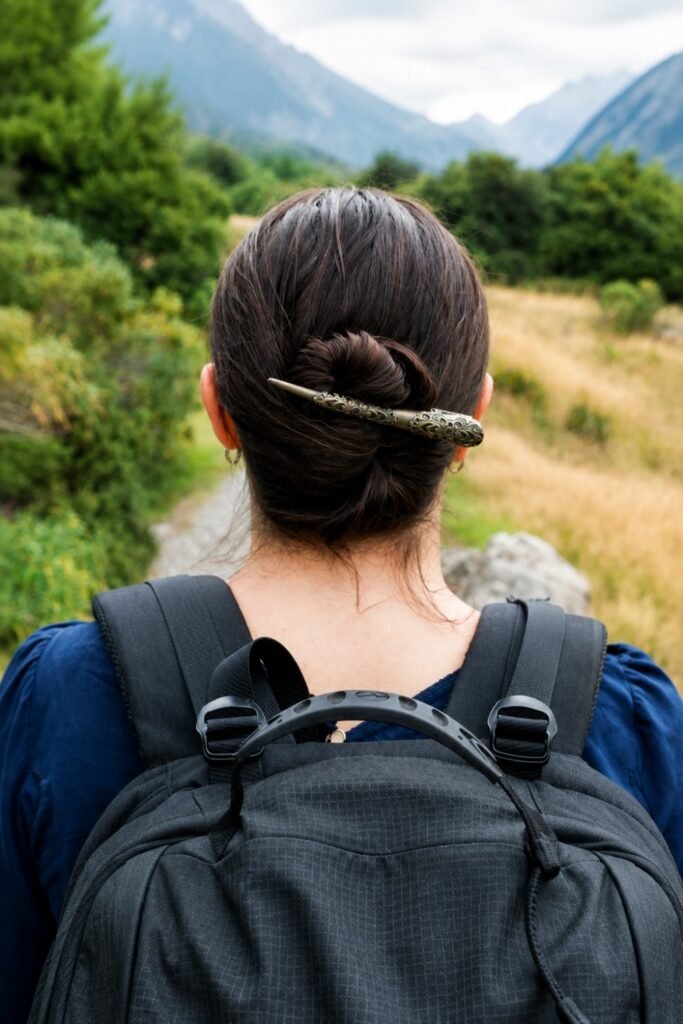
10. Low Bun at the Nape
Everything gathered low and twisted into a bun at the nape, secured with pins or a strong tie.
The most contained option at this length. Nothing hangs, so nothing catches on branches, rubs against the strap, or blows into your face.
Medium hair often produces a smaller bun than expected. Two crossed pins hold better than a single elastic wrap.
 Save
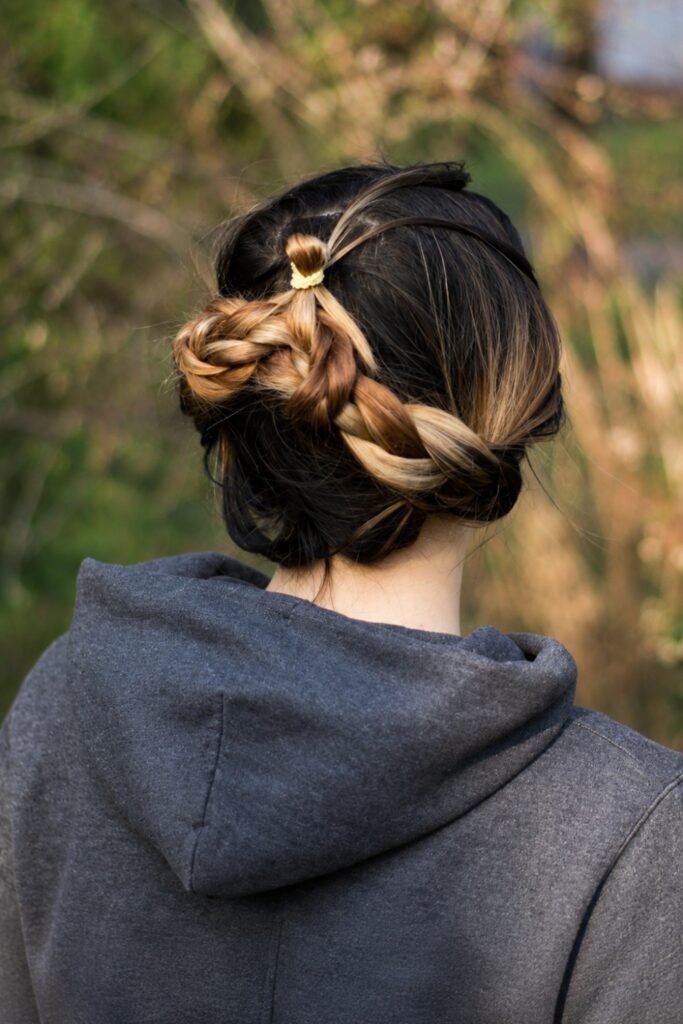
Save11. Braided Bun
A braid coiled into a bun and pinned.
The most secure style in this article. Braiding first anchors the layers, and coiling the braid means there are no loose ends at all.
Worth the extra few minutes for a long day or windy conditions. It genuinely does not move.
 Save
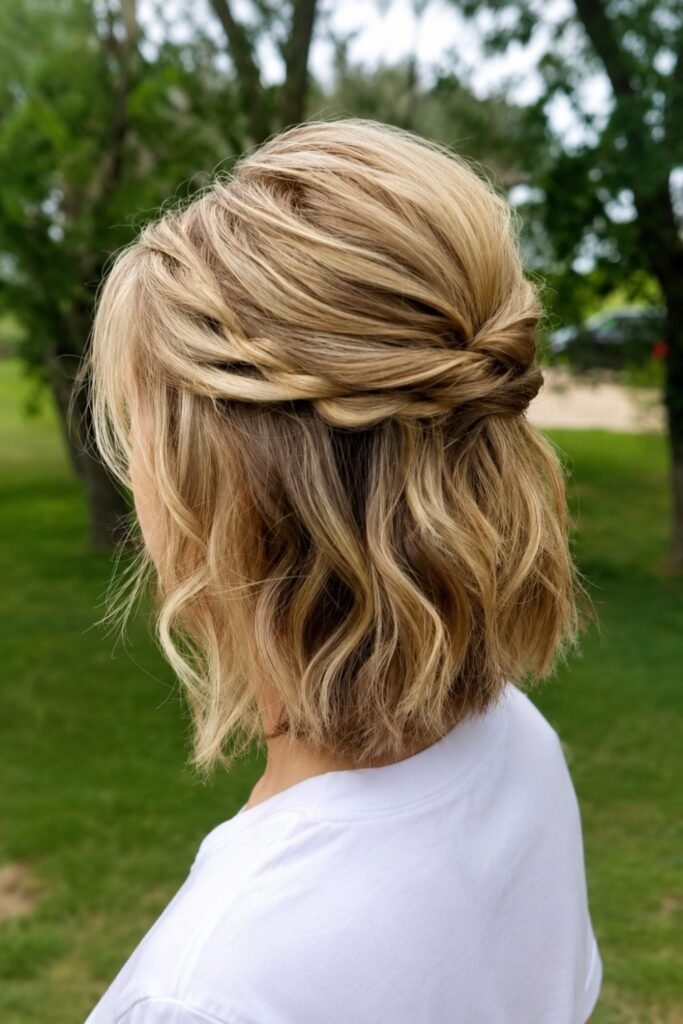
Save12. Half-Up Twist
Front sections twisted back and secured at the crown, with the rest of the length left down.
The compromise option, for warm days when you want your neck uncovered and your face clear. It handles the sections that actually cause problems and leaves the rest alone.
Not suitable for high wind or dense scrub, where the loose length will tangle.
 Save
SaveAccessories and Hat Integration
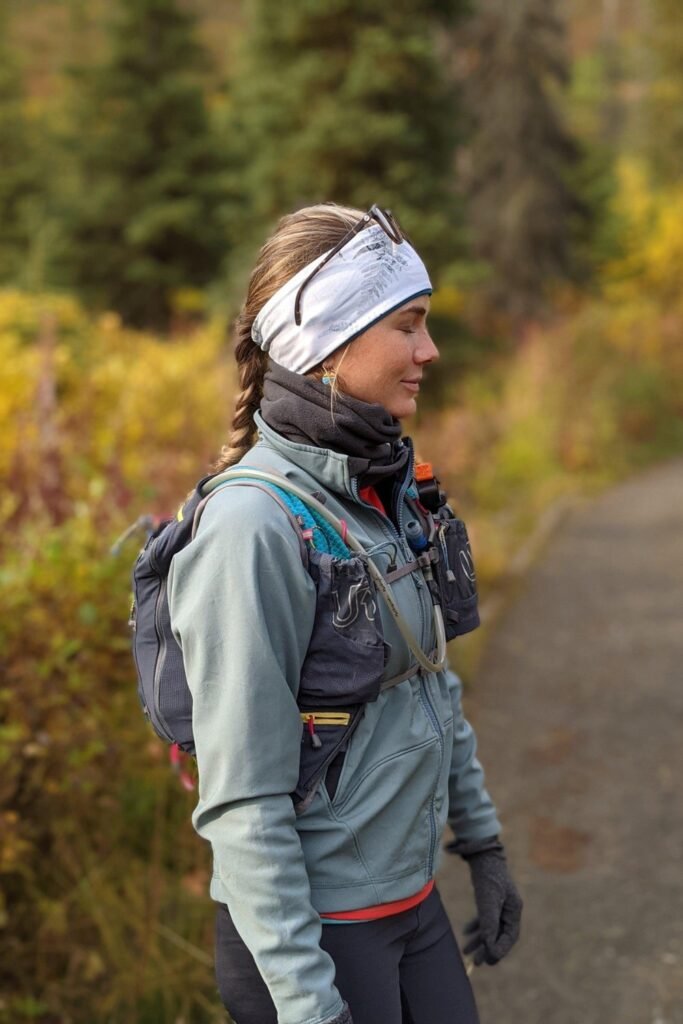
13. Wide Headband With a Low Style
A wide, soft, moisture-wicking headband worn with a low ponytail or braid.
Wide bands distribute pressure across a larger area, which is precisely why they cause fewer headaches than narrow ones. This is the safe way to use a headband at this length.
Test it at home for an hour before a full day. If you can feel it on your forehead after twenty minutes, size up.
 Save
Save14. Cap With a Ponytail Port
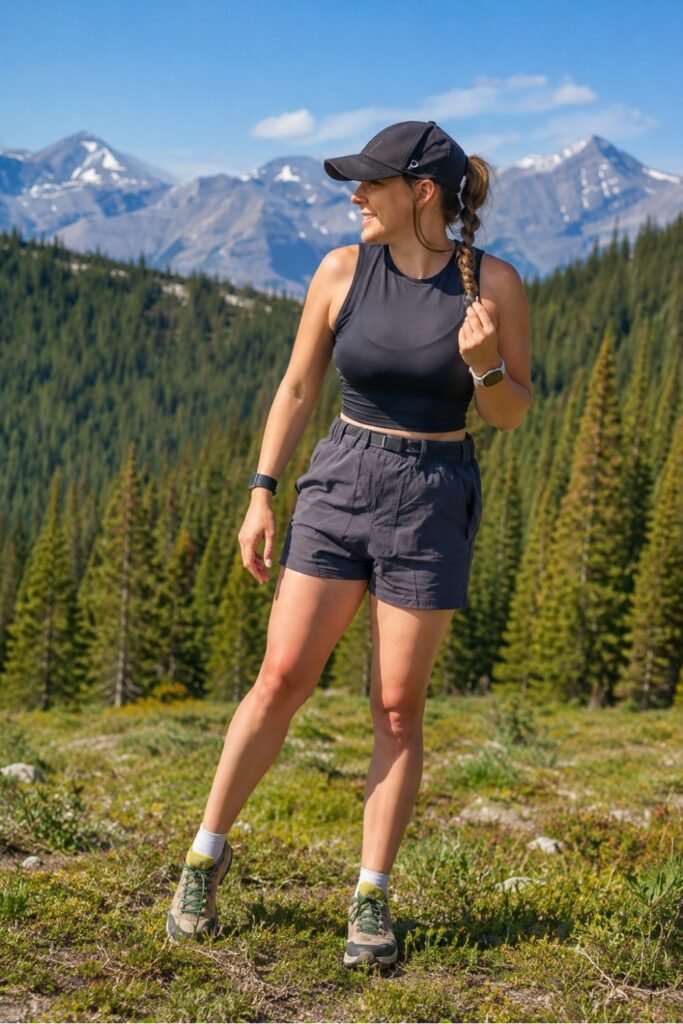
A hiking cap with a rear opening, worn with a mid or low ponytail fed through.
Solves the hat-versus-ponytail conflict directly. It also sits the hair behind the cap rather than compressed underneath it, which means it looks reasonable when you take the hat off.
The port position determines the ponytail height, so try the cap with your usual style before buying.
 Save
Save15. Bandana or Buff Over a Contained Style
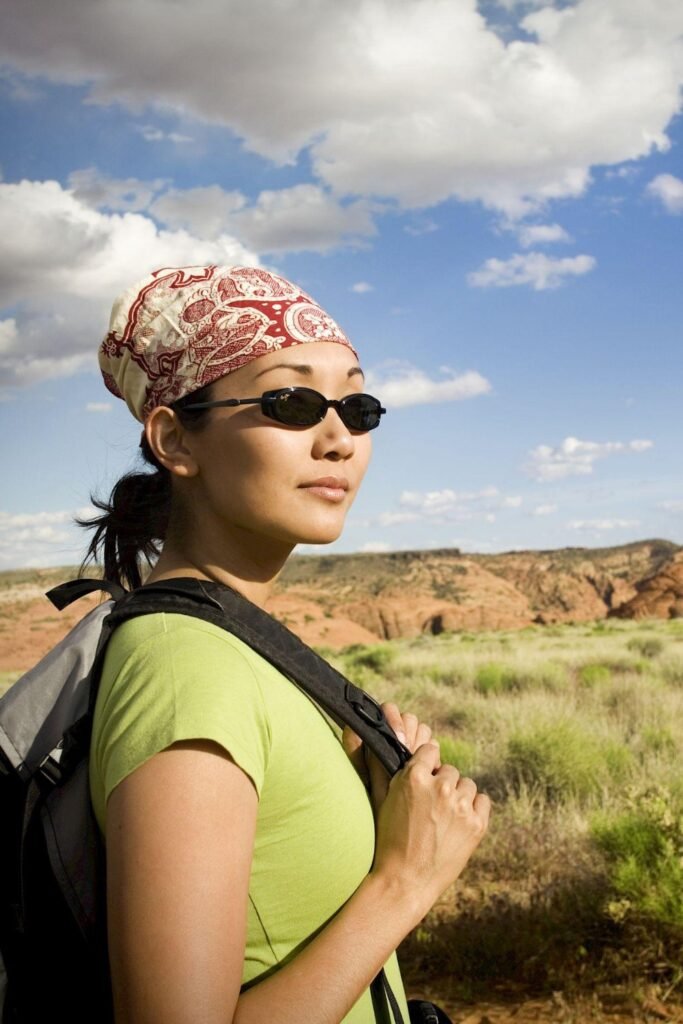
A bandana or neck gaiter worn over a low bun or braid, covering the crown.
The full-coverage option for exposed ridgelines and long sun days. It protects the scalp and the parting, keeps everything flat, and doubles as neck coverage.
Asia Bright notes that a bandana or hat minimises sun and heat exposure, and that keeping hair off the neck is what actually keeps you cooler on the trail.
 Save
SaveCare on Longer Trips
Hair dehydrates faster in the backcountry because of the combination of wind, heat, and sun, and dry hair tangles considerably more than conditioned hair does. That is the practical argument for moisturising, not a cosmetic one.
Bright recommends moisturising daily on the trail with a natural oil for locs and natural hair, and the underlying point applies broadly. A small bottle of leave-in or oil is negligible pack weight and prevents the knots that make a style impossible to redo.
For multi-day trips, consider a style installed before you leave rather than one you maintain daily. If you have textured hair, protective styling is by some distance the most practical approach, and our guide to protective styles for Black hair covers the options and the upkeep routine.
If You Are Thinking of Cutting It
Some hikers cut before a long trip and it is a legitimate choice rather than a defeat. If you are considering it, the decision is really about which set of problems you would rather have.
Going shorter removes the tangling and the strap interference entirely, and it dries in minutes rather than hours. It also means nothing to tie back, which is a different management problem with its own solutions.
If you are weighing a cut, our guide to short graduated bob haircuts covers the nape length question, which matters more than most people expect: a graduated nape sits above the sweat line and stays noticeably drier than a blunt one.
Common Questions
Why do my layers keep falling out of my ponytail?
Because an elastic only holds the hair it can reach. Any layer shorter than the gathering point is not secured by anything, which is the shingling problem specific to medium length. The fix is anchoring rather than tighter tying: a Dutch braid weaves the short pieces in along its length, and a multi-elastic ponytail creates several contact points instead of one.
Where should my ponytail sit if I am wearing a pack?
High on the crown, low at the nape underneath the strap, or split into two low sections either side. A single mid-height ponytail lands directly on most pack straps, where it rubs and gets pushed forward every time you adjust the load.
Can I wear a ponytail under a cap?
A high ponytail generally does not work under a standard cap. Either choose a cap with a rear ponytail port, or switch to a low style that sits comfortably beneath the band. Low pigtails and a low nape ponytail both work well under a brimmed hat.
Are headbands bad for your hair?
Tight ones can be. A headband worn too tightly restricts circulation around the forehead, causes headaches, and over time can contribute to hair loss along the hairline. Wide, soft, moisture-wicking bands distribute pressure and are the safer choice. If you can feel it after twenty minutes, it is too tight.
What is the best style for a multi-day hike?
Something installed once that holds for days rather than something you redo each morning. Double Dutch braids or a braided bun both survive several days with minimal attention. For textured hair, a protective style installed before you travel is the most practical option by a considerable margin.
Final Thoughts
The reason ponytails fail at this length is not that you are tying them badly. It is that a single gathering point cannot hold layers shorter than itself, and that most people put the ponytail exactly where their pack strap is.
Anchor the hair into itself, put it above or below the strap line, and check your headband is not too tight. Test whatever you choose on a short local walk first, because the style that holds for twenty minutes in a mirror is not always the one that holds for six hours on a hill.