Rubberband hairstyles have been a staple in Black hair care for generations. The technique uses small elastics placed at intervals along sections of hair, creating graphic patterns that look intricate but are achievable at home with basic tools.
Elastics hold the hair without heat, and the patterns can be as simple or as detailed as time allows, which makes these styles a favorite for busy school mornings.
These 17 rubberband hairstyle ideas for kids cover every length, pattern, and occasion, with the specific tool, technique, and care guidance for each.
What You Need Before You Start
Small clear or coloured elastics, not thick rubber bands that snap or pull, are the foundation of every style here. Scunci or Goody brand no-damage elastics in size small are the most commonly recommended.
A rat-tail comb for clean parting, edge gel for the hairline, and a light oil such as coconut or jojoba for moisture before styling. That is the full toolkit.
Section the hair on damp, detangled hair only. Dry tangled hair and rubberband techniques do not mix. Detangle from tip to root with a wide-tooth comb before touching the elastics.
Classic Rubberband Hairstyles for Kids
1. Two-Section Rubberband Ponytails
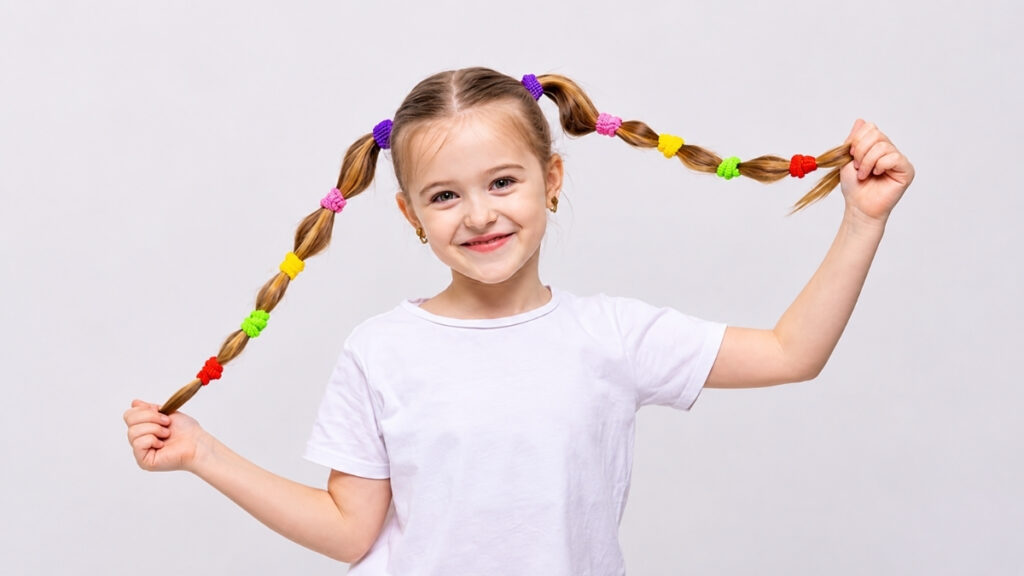
The hair divided into two equal sections, front and back, each gathered and secured with rubberbands placed at the base and at one-inch intervals down the length.
This is the entry-level rubberband style. It takes about fifteen minutes on a cooperative child. The bands at intervals keep the hair from slipping and add the stacked visual that makes this look more finished than a plain ponytail.
Use matching coloured elastics on both sides for a polished result. Mismatched colours on a young child also reads as intentional if the palette is consistent.
 Save
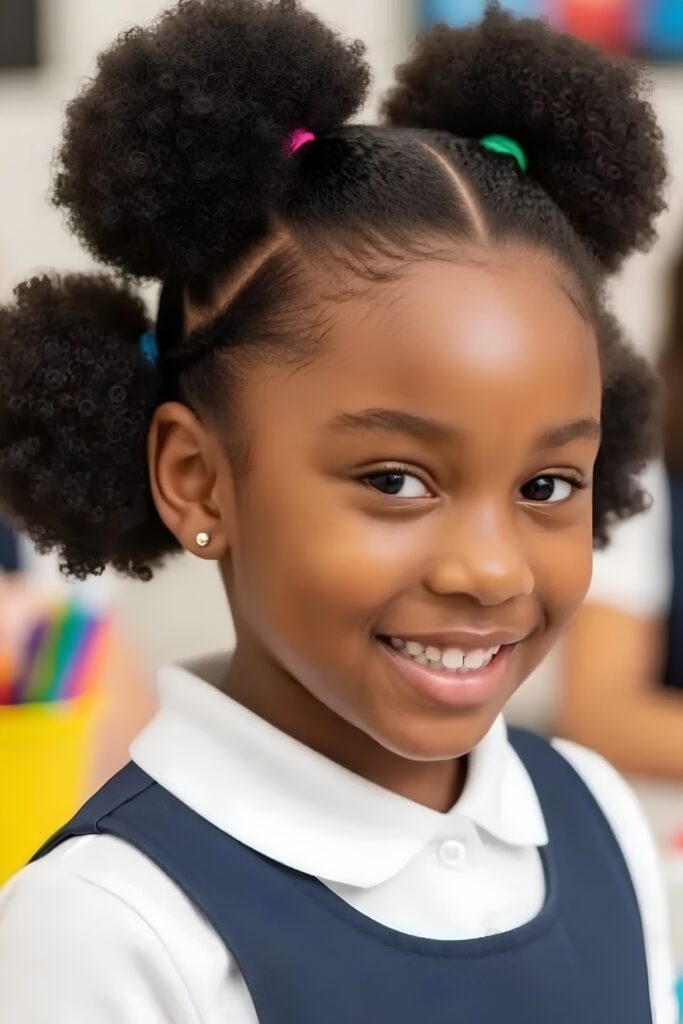
2. Four-Section Rubberband Puffs
Hair divided into four equal sections using a cross parting, each section gathered into a puff and secured with a rubberband at the base, the four puffs sitting at front-left, front-right, back-left, and back-right.
The cross parting needs to be clean and centred. A rat-tail comb handle pressed along the scalp from front to back and then side to side creates the clean line. Gel along the part lines before securing the puffs keeps the sections neat through a school day.
 Save
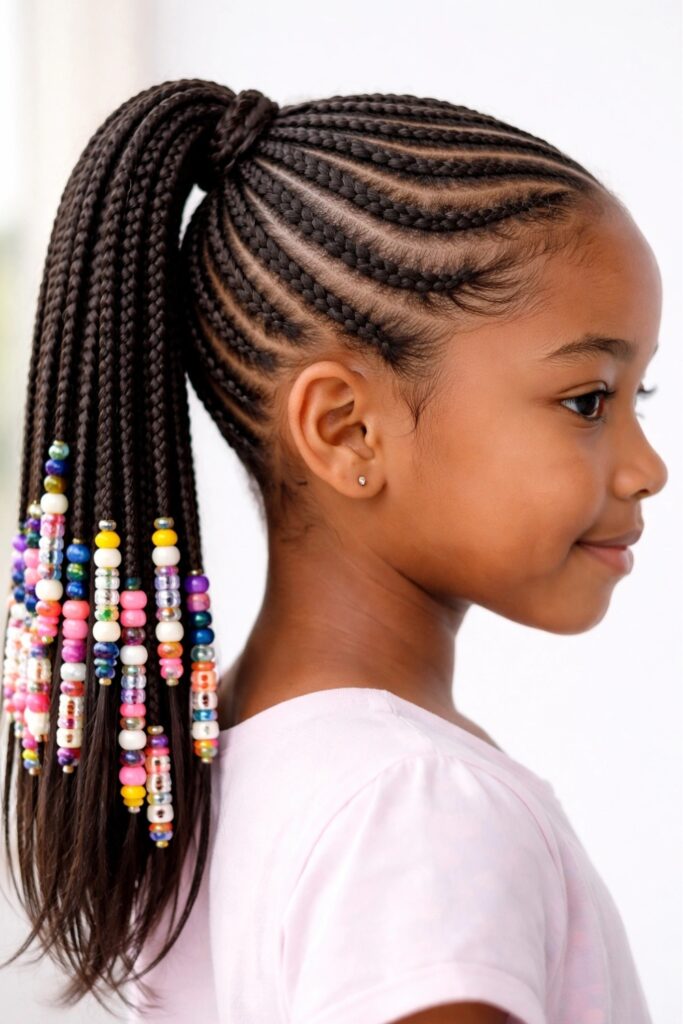
3. Rubberband Ponytail with Beads
A single or double high ponytail secured with rubberbands at the base and at intervals down the length, with coloured or wooden beads threaded onto the ponytail and held in place by the bottom elastic.
Beads are the detail that takes this from practical to celebratory. Thread them onto the ponytail after the last rubberband and tie a small knot or use the bottom elastic to stop them sliding off. Gold, red, or coloured beads all work for school-age children.
 Save
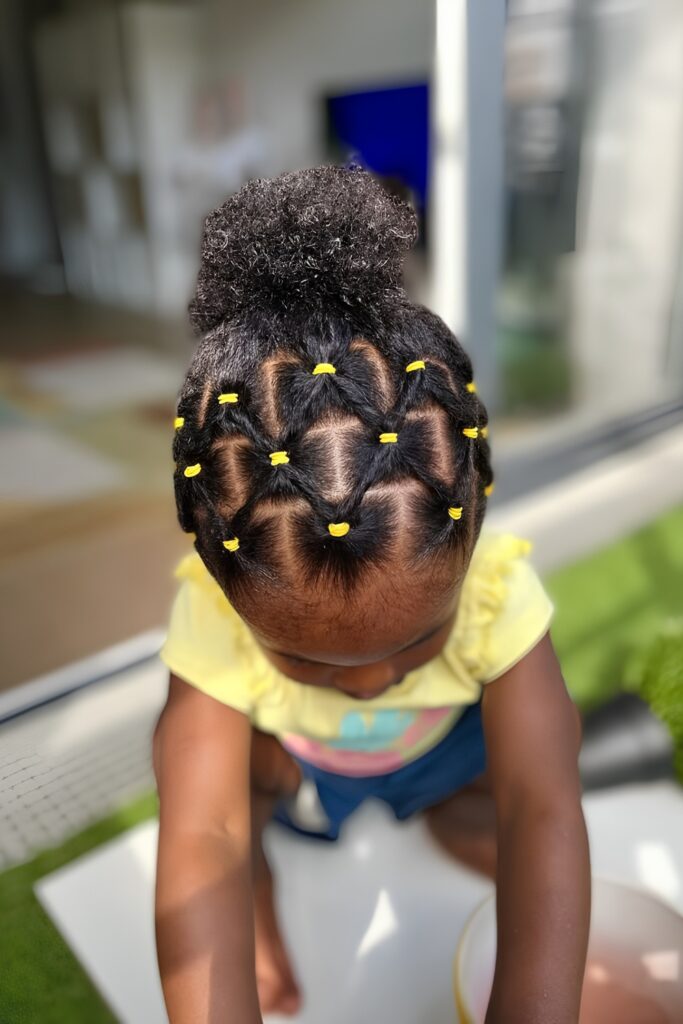
4. Single High Puff with Rubberband Stack
All hair gathered into a single high puff at the crown, with three to four rubberbands stacked at the base rather than one, the stacking creating a graphic, intentional look at the root.
Stack the bands one on top of the other rather than placing them at intervals. The stacked base reads as decorative rather than purely functional. Use three bands in alternating colours for the most visual interest on a young child.
 Save
Rubberband Braid and Section Styles
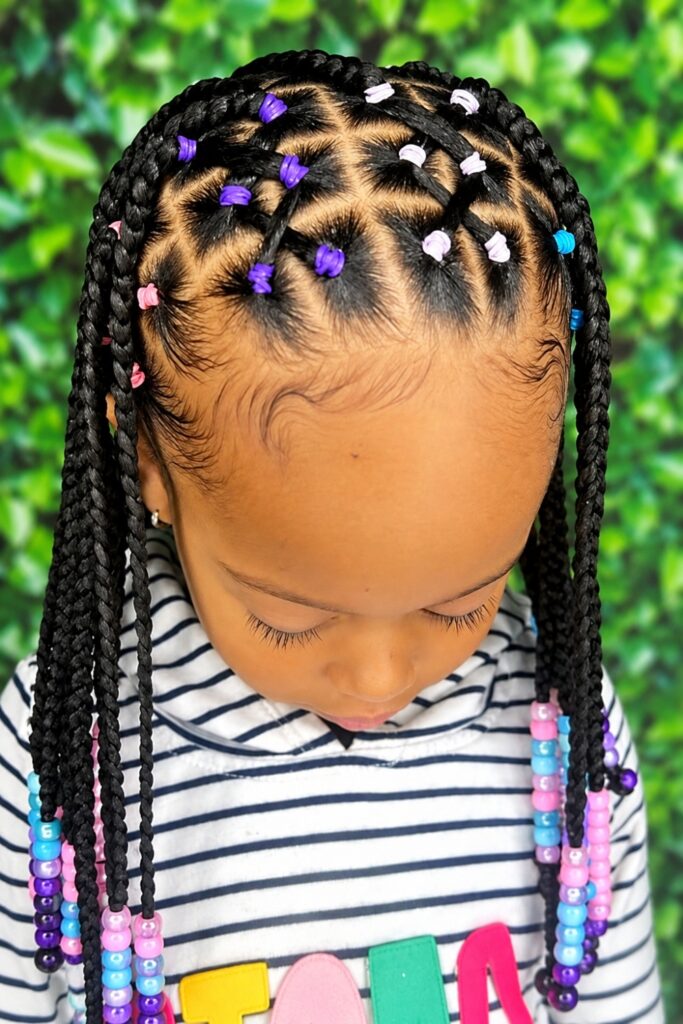
5. Rubberband Box Sections into Ponytails
Hair divided into uniform box sections across the entire head using a rat-tail comb, each section secured at the base with a rubberband, then gathered into a larger ponytail or left as individual sections hanging down.
The uniform box parting is the time-intensive part. Allow forty-five minutes to an hour for this style on a full head of hair. The result lasts a week with a satin bonnet at night.
Use a ruler or section clips to keep the box sizes consistent. Uneven sections are visible from the front and make an otherwise clean style look rushed.
 Save
6. Rubberband to Braid Combination
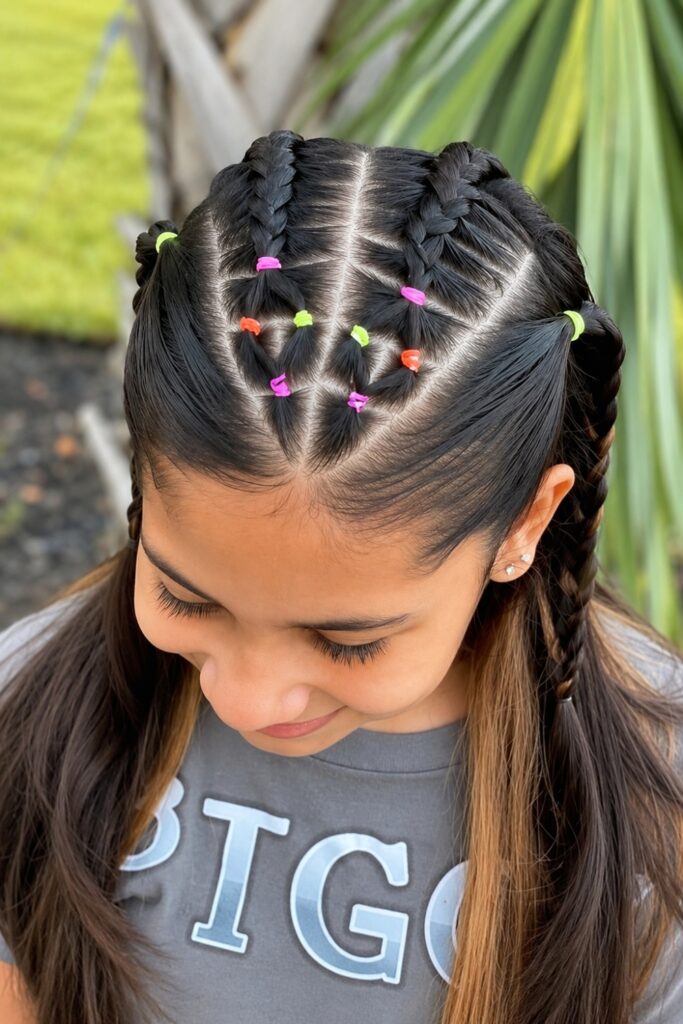
Hair gathered into a rubberband-secured section at the scalp, then braided from the elastic downward, the braid continuing to the end of the hair. Repeated across multiple sections.
The rubberband secures the root before the braid begins. This keeps the parting clean even if the braiding at the root is not perfectly tight. It is the technique that makes rubberband-to-braid accessible for parents who braid at an intermediate rather than expert level.
For the braiding techniques that work best on kids’ hair including protective styles that last through active play, the braided sporty hairstyles guide covers the braid approaches that apply directly to rubberband-to-braid styles on active children.
 Save
7. Criss-Cross Rubberband Pattern
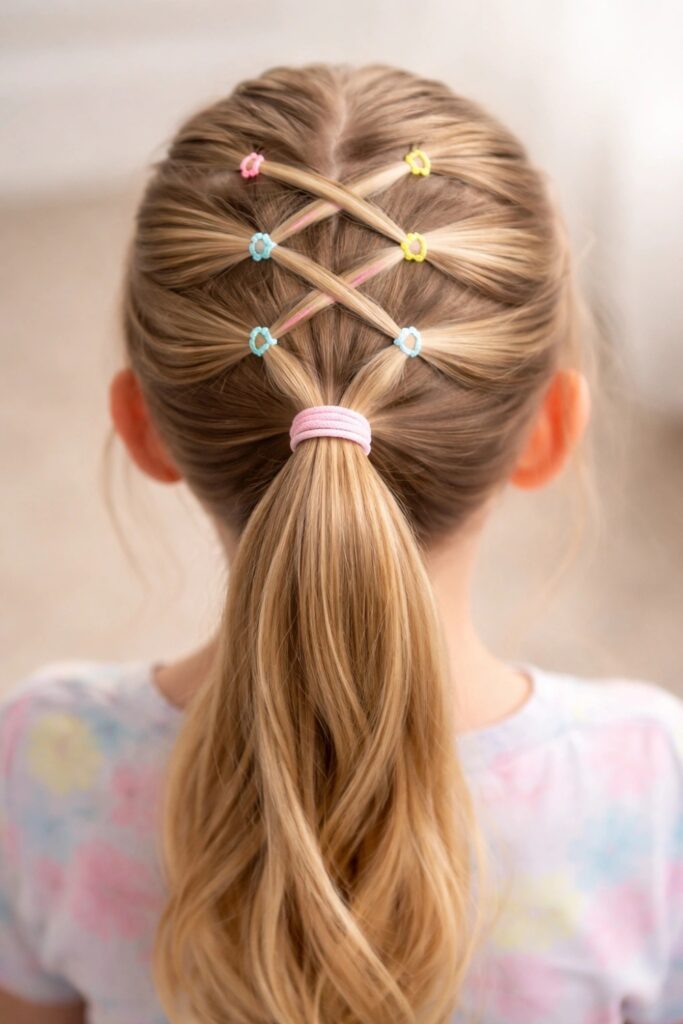
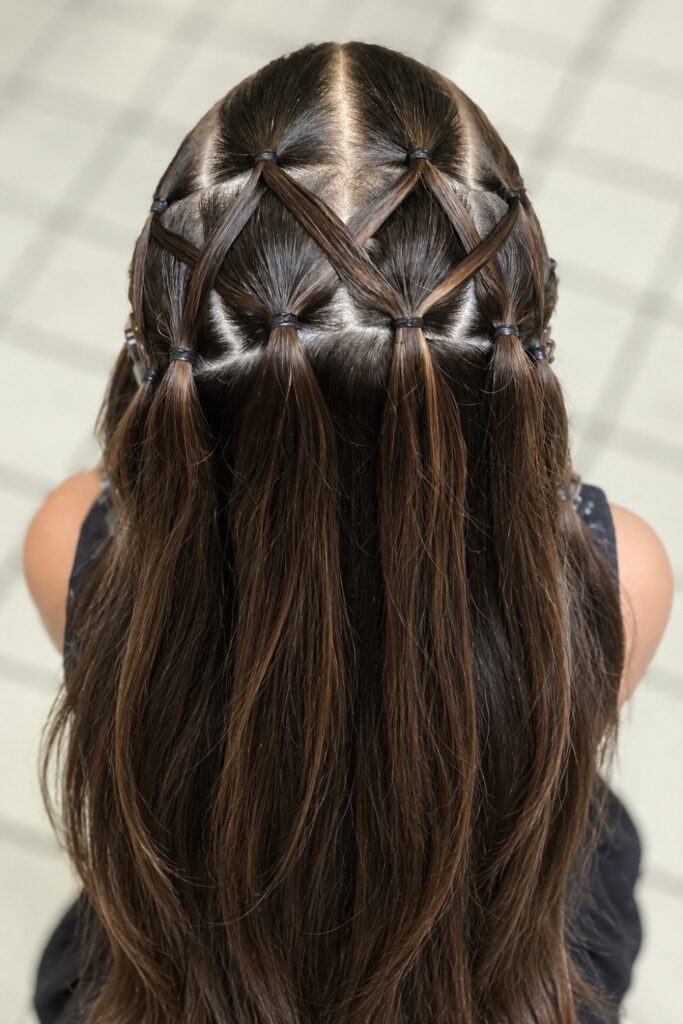
Sections secured with rubberbands at the scalp, then connected to adjacent sections using additional elastics, creating a criss-cross diamond pattern across the back or sides of the head.
Secure the base sections first. Then use a second rubberband to connect the lower half of one section to the lower half of the adjacent section. The crossing elastic creates the diamond between the two connection points.
This technique is easier to see than to describe. Search “criss-cross rubberband kids” on YouTube before attempting. Two or three diagonal rows of diamonds across the back of the head is the most manageable version for beginners.
 Save
8. Rubberband Lemonade-Inspired Side Sections
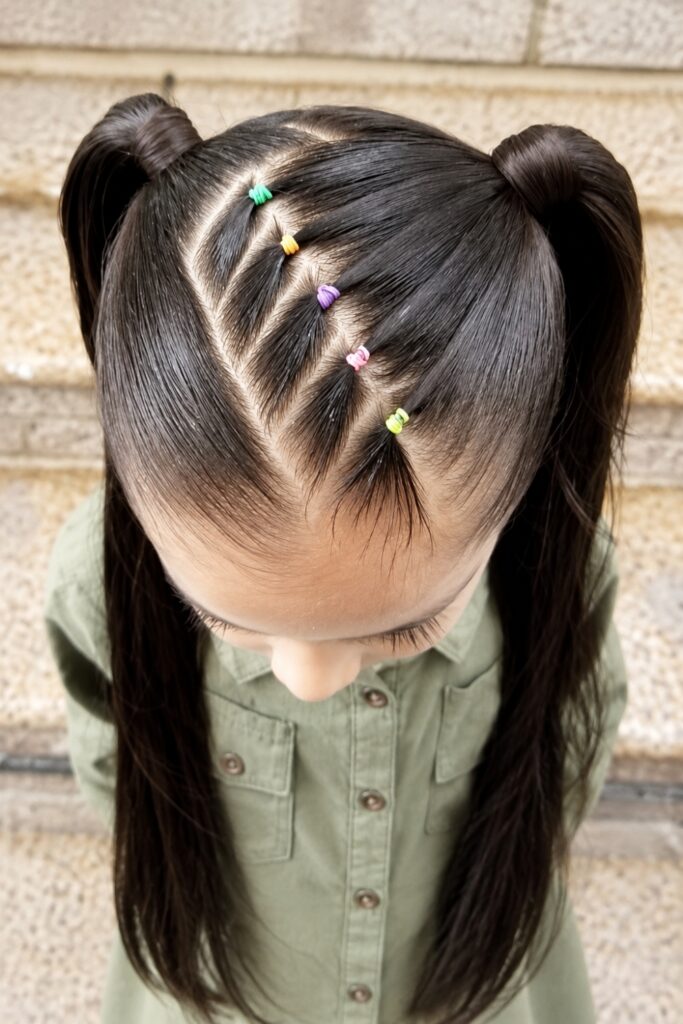
All sections parted from front-right to back-left in diagonal lines, each section secured with a rubberband at the scalp, the diagonal part pattern creating the Lemonade braid-inspired graphic across the head.
The diagonal parting is the defining element. It needs to be consistent in angle all the way across the head. A rat-tail comb pulled at the same angle from section to section maintains the pattern.
 Save
Rubberband Styles with Colour and Accessories
9. Rainbow Rubberband Ponytails
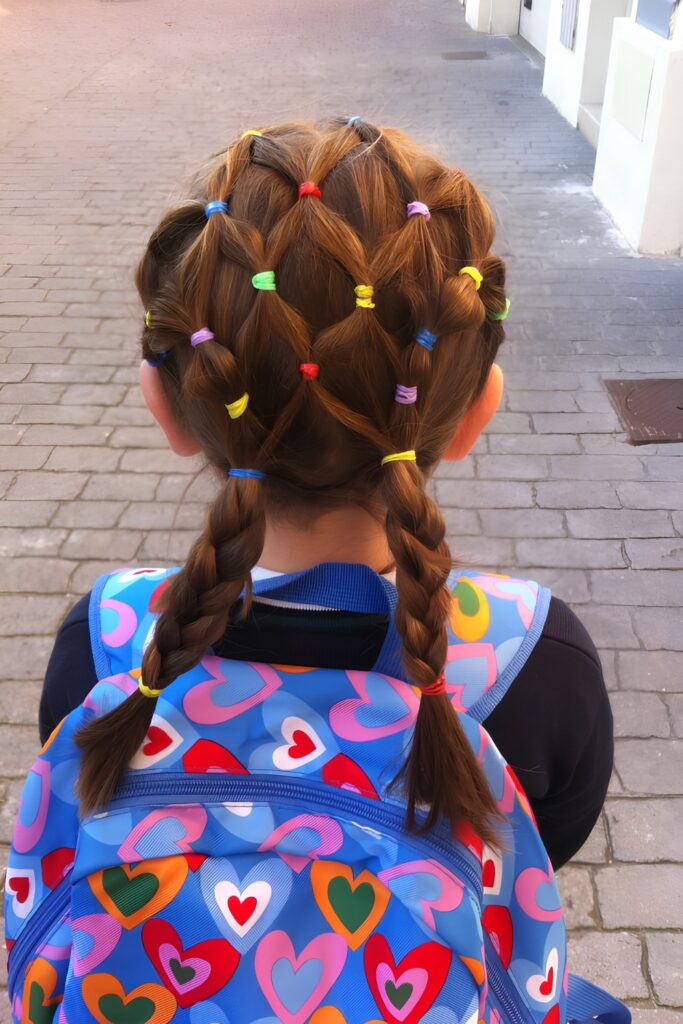
Two or four ponytails secured with rubberbands in a rainbow colour sequence, red, orange, yellow, green, blue, and purple, with one colour per band placement down the length of each ponytail.
This is the most popular rubberband style for school events, birthdays, and celebrations. The colour sequence needs to follow the same order on each ponytail for the look to read as intentional rather than random.
 Save
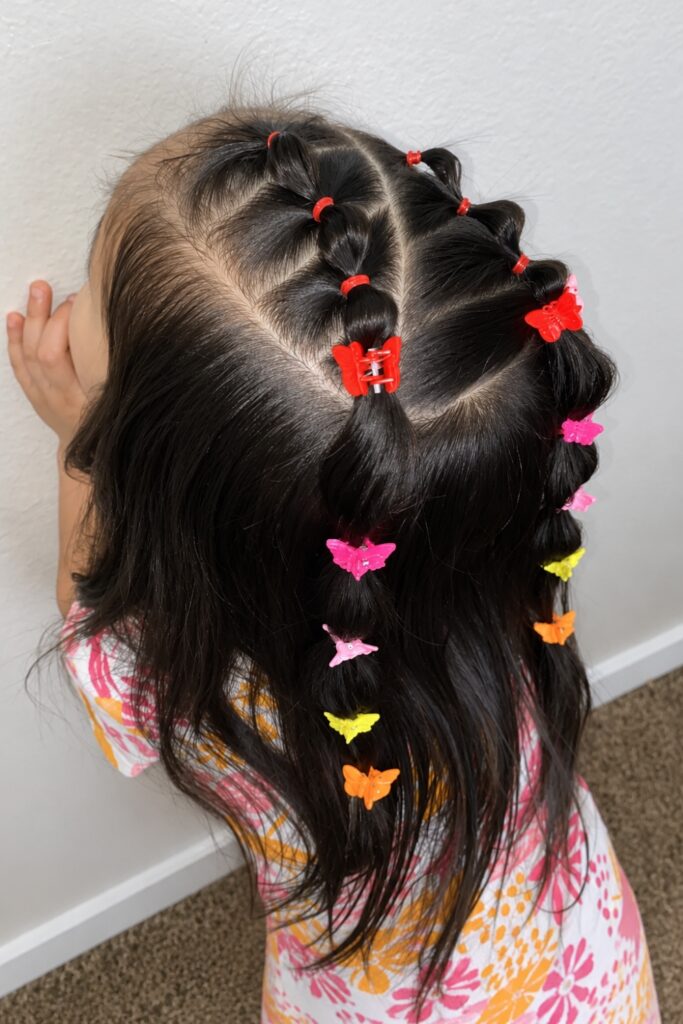
10. Rubberband Sections with Barrette Clips
Box or row sections secured with clear rubberbands at the scalp, with a decorative barrette clip snapped onto the rubberband at the root of each section, the clips adding colour and decoration to an otherwise simple parting style.
Duck-shaped, star, or butterfly clips in bright colours read best on school-age children. Place the clip over the rubberband after it is secured rather than trying to clip and band at the same time.
 Save
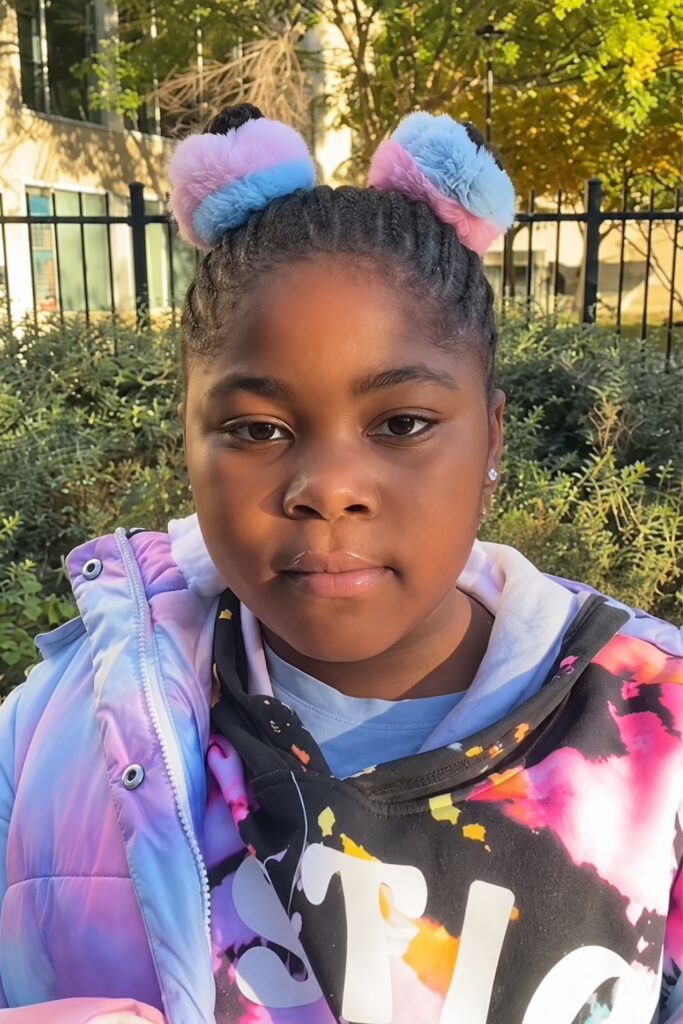
11. Two-Tone Rubberband Puffs
Four or six puffs across the head, with alternating sections using two different elastic colours, one side in pink, the other in white, or alternating gold and black throughout.
The two-tone pattern creates a visual rhythm across the head that reads as a design decision. Keep the hair texture and puff size consistent and let the elastic colours carry the pattern.
 Save
Quick Rubberband Styles for School Days
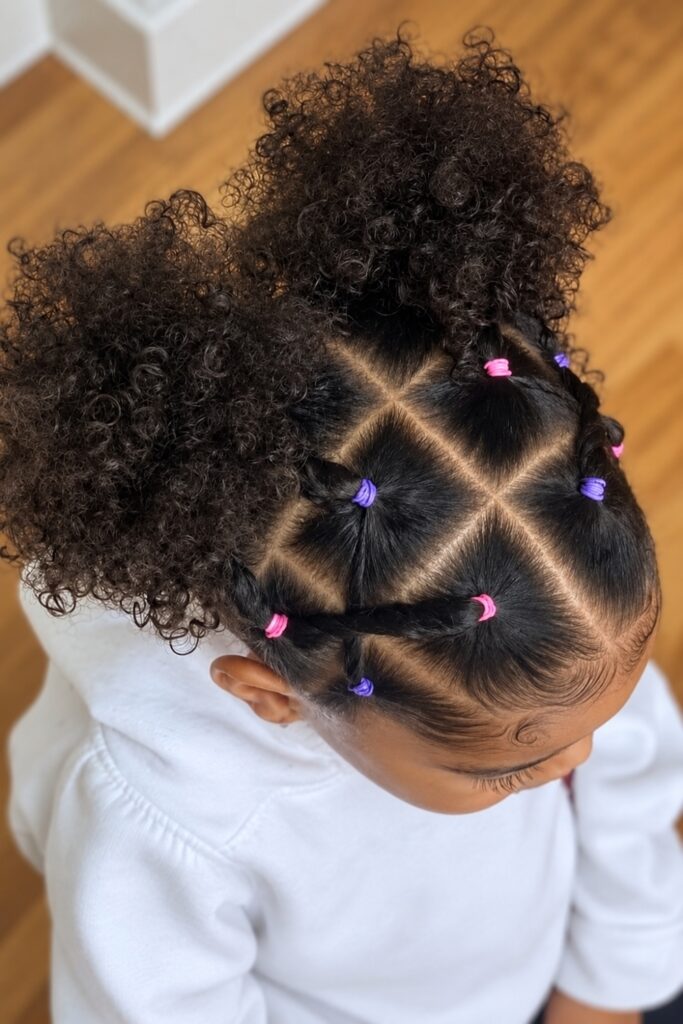
12. One-Minute Rubberband Puff
All hair gathered into a single puff and secured with two rubberbands at the base, taking under a minute when the hair is already detangled. The fastest rubberband style on this list.
Pre-detangle the night before and sleep in a satin bonnet. In the morning, gather, band twice, and smooth the edges with gel. The double band at the base is more secure than one and prevents the puff from drooping by midday.
 Save
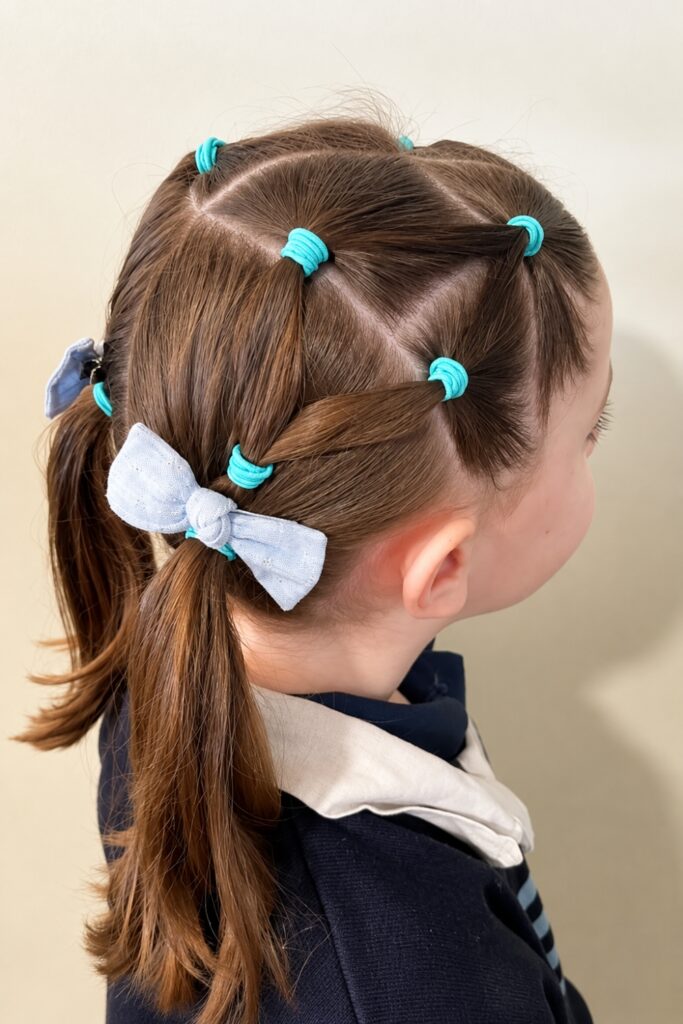
13. Front Rubberband Pull-Back with Natural Back
Only the front section of hair pulled back and secured with a rubberband at the crown, the back section left natural and out, the partial pull-back keeping hair off the face without requiring full styling.
This takes three minutes maximum. Use a wide headband to smooth the front before gathering. Apply edge gel to the hairline after securing. The natural back section looks intentional when the front pull-back is clean.
 Save
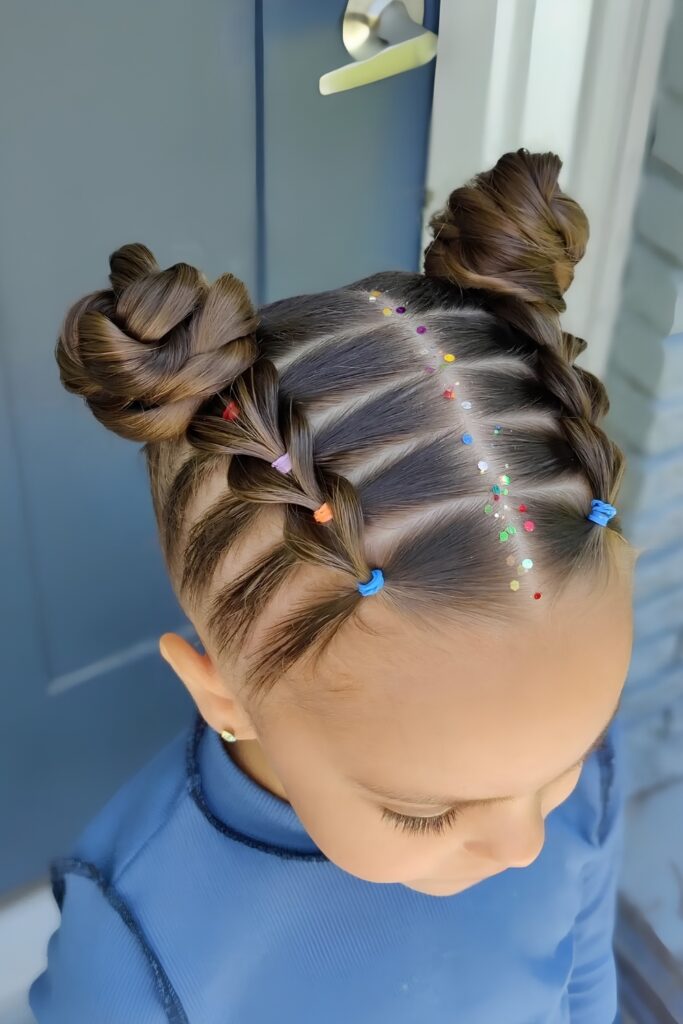
14. Double Rubberband Buns
Hair divided into two sections, each gathered and looped through itself to form a bun at the crown, secured with two rubberbands each, the double bun sitting on either side of the head.
Space-bun adjacent and loved by children who prefer their hair fully up. The double rubberband on each bun keeps it secure through a full day of activity including running and playground equipment.
For the ponytail and bun techniques that keep kids’ hair secure through active play, the ponytail hairstyles for Black hair guide covers the gathered updo approaches that translate directly to rubberband bun styles for children.
 Save
Protective Rubberband Styles for Kids
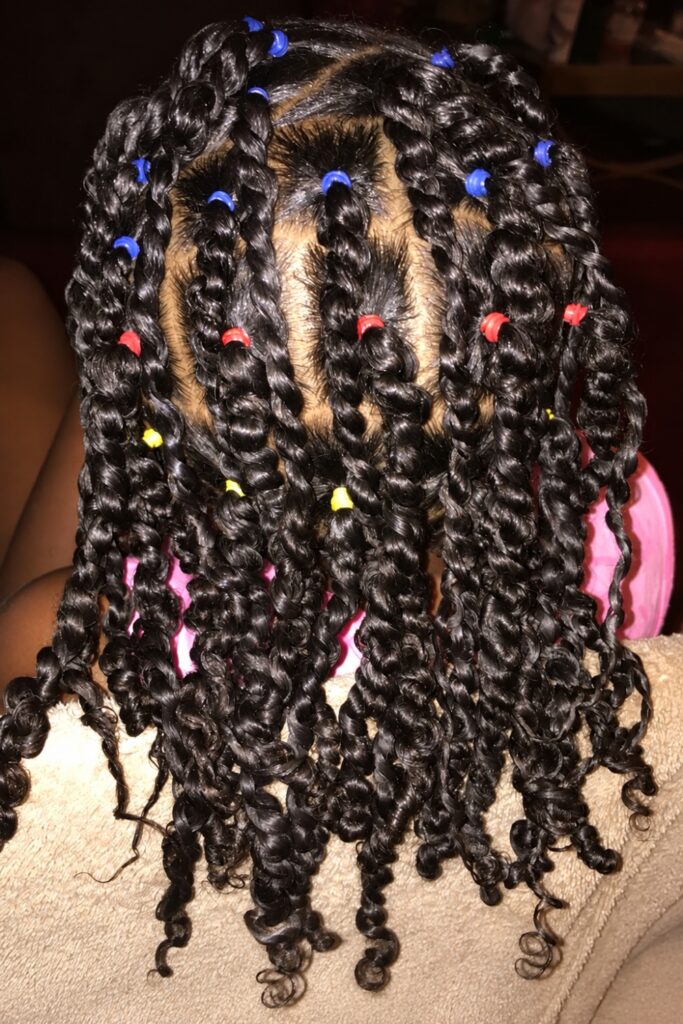
15. Rubberband Sections into Mini Twists
Hair divided into small box sections with a rubberband at each root, then twisted from the elastic downward, the rubberbands keeping the root parting clean while the twists protect the length.
This style lasts up to two weeks with nightly satin bonnet wear and a light oil applied to the scalp twice a week. It is the longest-lasting rubberband style on this list and requires the most installation time, roughly two hours.
 Save
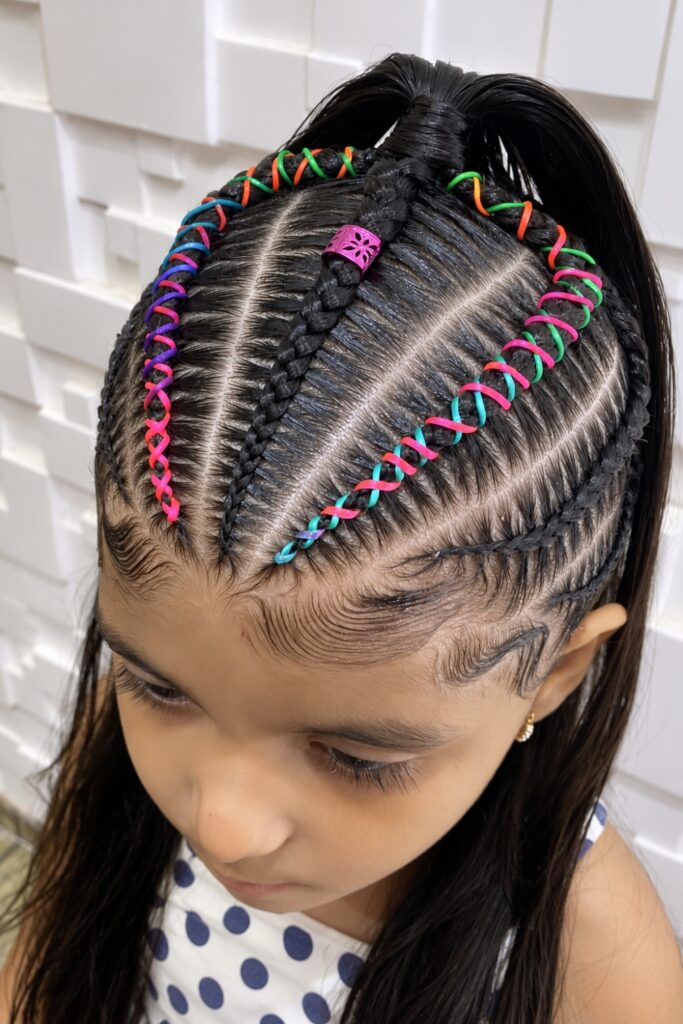
16. Rubberband Cornrow Sections
Hair divided into row sections using a rat-tail comb, each row secured at the scalp with a rubberband before being cornrowed backward, the rubberband keeping the part crisp while the cornrow protects the length.
The rubberband at the root makes the cornrow part cleaner than freehand parting alone. Remove it after the first few inches of the braid have secured the root, or leave it in if it stays flat and does not cause tension.
For the full range of protective braid styles for kids including installation and care, the jumbo box braids guide covers the braid techniques and longevity tips that apply directly to rubberband-cornrow protective styles for children.
 Save
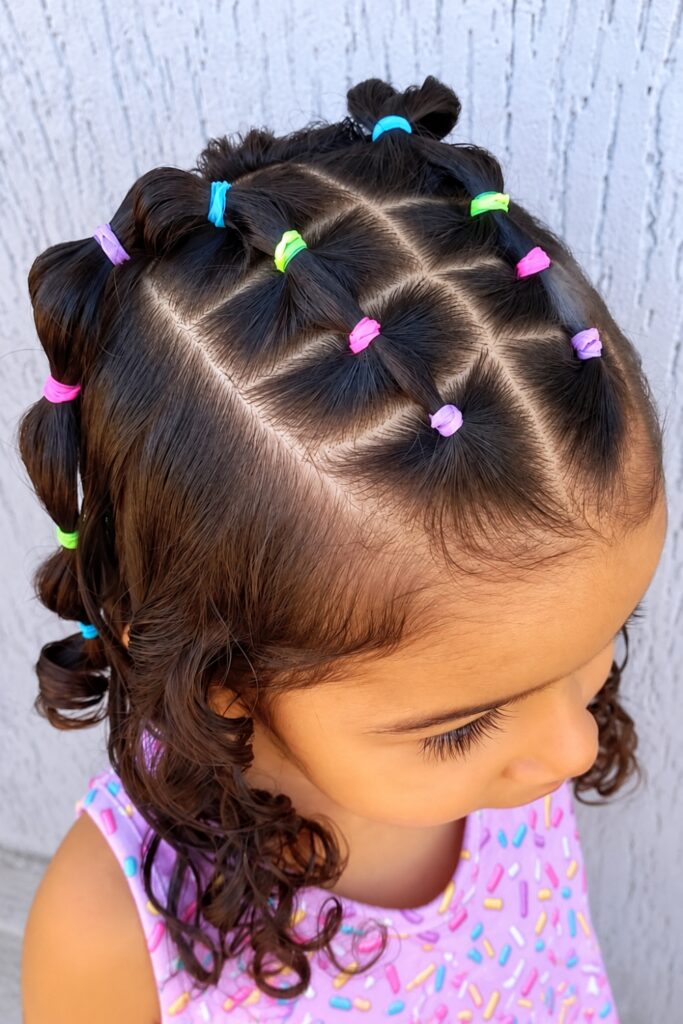
17. Full-Head Rubberband Box Sections with Ends Loose
A full head of uniform box sections, each secured with a rubberband at the root only, with the hair below each band left loose and natural rather than braided or twisted.
This is the rubberband style that photographs most distinctively on natural hair because the uniform sections at the scalp contrast with the full, natural texture below. It protects the roots without manipulating the ends.
This style works best on hair that is long enough for the sections to hang separately without bunching together. At least four inches of length below each rubberband is the minimum for this to read clearly.
 Save
Rubberband Hair Care for Kids
How to Remove Rubberbands Without Breakage
Use a seam ripper or small scissors to cut the elastic rather than pulling it off. Pulling rubberbands off dry natural hair is the single biggest cause of breakage at the root. Cut the band, then gently unwind the hair.
Apply a small amount of oil or detangling spray to the rubberband area before cutting if the elastic has been in for more than two days. This loosens any hair caught in the band before cutting.
How Long Rubberband Styles Last
Simple styles like the single puff and four-section puffs last one to two days. Box section styles and rubberband-to-braid combinations last five to seven days with a satin bonnet at night.
Refresh the edges with gel every two days regardless of the style. The edges show wear before the body of the style does and are the fastest signal that the style needs to be redone.
Frequently Asked Questions
Are rubberband hairstyles safe for kids?
Yes, when the right elastics are used. Small no-damage elastics from brands like Scunci or Goody, not thick office rubber bands, are safe for children’s hair. The elastic should never feel tight enough to cause discomfort at the scalp. If the child complains of tension or the scalp shows redness or bumps at the elastic points, loosen or remove the style immediately.
How long do rubberband hairstyles last on kids?
Simple two or four puff styles last one to two days. Box section styles with rubberbands at each part last five to seven days with nightly satin bonnet protection. Rubberband-to-braid or rubberband-to-twist styles last seven to fourteen days with proper scalp oiling and edge care every two to three days.
What elastics are best for kids’ rubberband hairstyles?
Small clear or coloured no-damage elastics in the thin size, not thick or wide bands. Scunci no-damage clear elastics and Goody Ouchless elastics are both widely used. The elastic should secure the hair without leaving a dent or causing friction. Replace elastics as soon as they show signs of stretching or wear rather than doubling up.
How do you keep rubberband styles neat on active kids?
Apply a light gel or edge control product along the part lines and hairline before styling. Sleep in a satin bonnet or on a satin pillowcase nightly. Refresh edges every two days with a small amount of edge gel smoothed with a soft brush. The style body stays intact if the edges are maintained.
Can rubberband hairstyles be done on short kids’ hair?
Yes, but the style options are more limited. Hair needs at least two inches of length for a rubberband to hold without slipping. At two to three inches, single or four-section puffs and rubberband pull-backs work well. Below two inches, the elastic slips and does not create a visible secured section. The rainbow rubberband and bead styles need at least three to four inches of length for the decoration to read clearly.
Final Thoughts
Rubberband hairstyles for kids are one of the most practical and creative options in natural hair care for children. The tools are cheap, the technique is learnable, and the styles hold through a full school day with the right elastics and edge gel.
Start with the four-section puffs or the single high puff if this is new territory. Add the criss-cross pattern once the basic sections feel easy. The more complex box section and rubberband-to-braid styles come naturally after that.