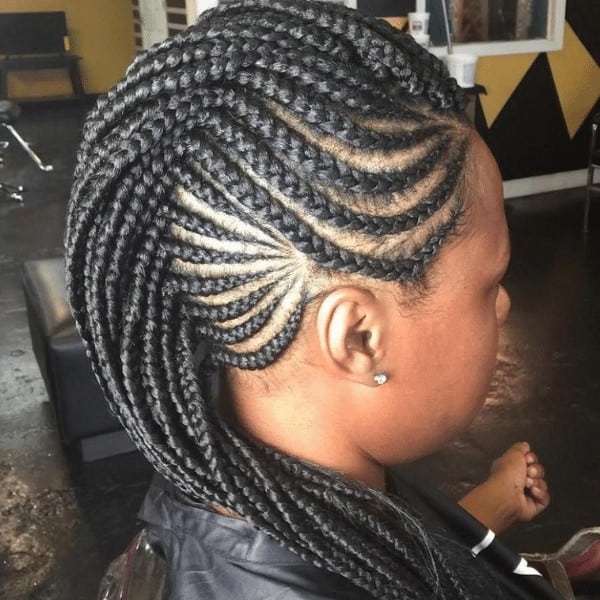
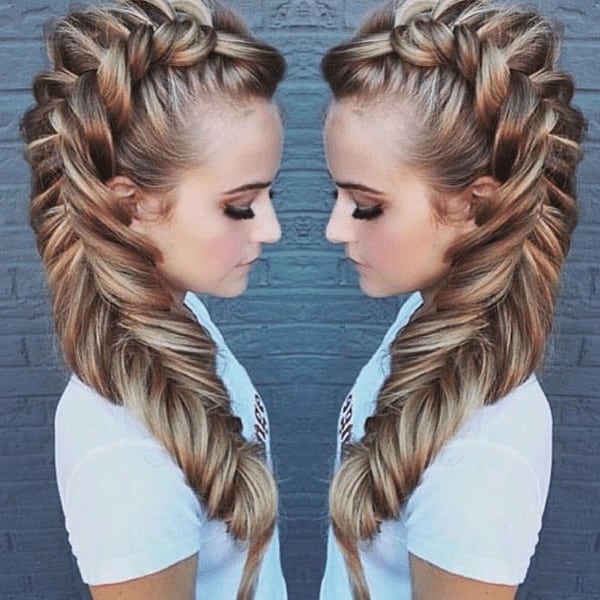
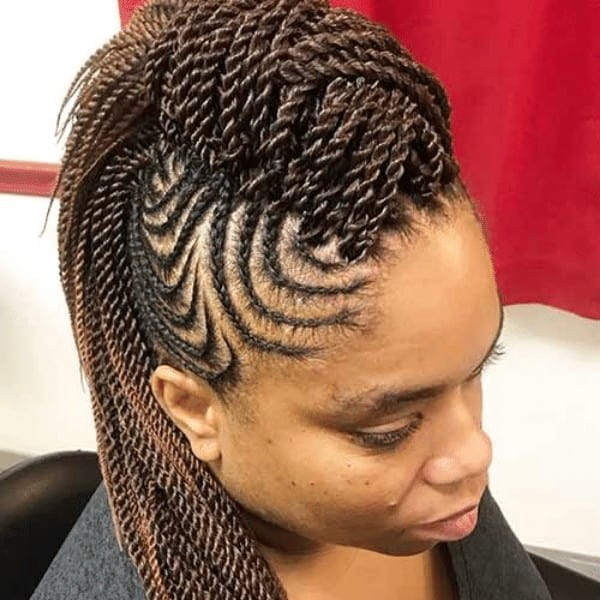
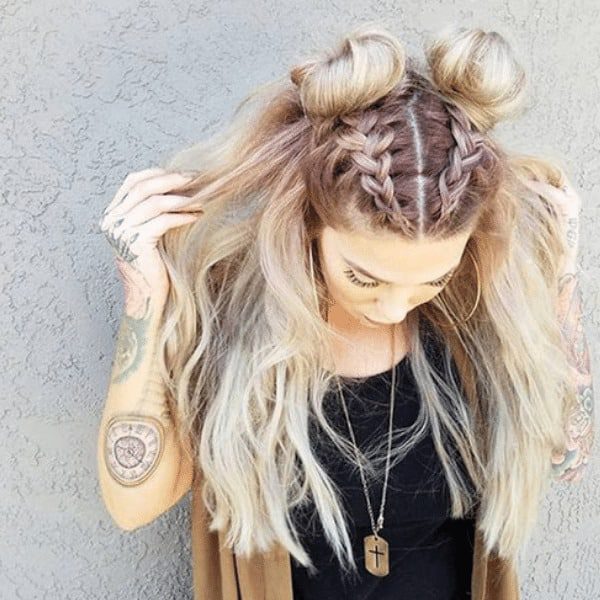
Mohawk braids have a traditional Mohawk pattern that goes down the middle of the head.
Jump Link
History
The Mohawk hairstyle consists of shaving both sides of the head, parting a bit of considerably longer hair. In the 1980s, Mohawks became universal in punk subculture and Rive-thead subculture and were then adopted by numerous other audiences, more varied in style.
Nowadays, the Mohawks are still associated with the Punk subculture, but they have also become part of everyday fashion hairstyles, particularly with more toned-down false-hawk designs.
Significance of Mohawk hairstyle
Sporting a mohawk isn’t a faint heart, and it’s a hairstyle that sets you apart from anyone else. The braided Mohawk is a big trend these days, and if you can pull it off, you’ll have a hairstyle that will save you a lot of time when you get ready in the morning. There was a time when punk rockers were only sporting mohawk’s, but that’s a thing of the past.
Steps to do in Mohawk braids
- When you try a new hairstyle, it might be tempting to wash your hair first so that you begin with a squeaky, clean canvas. However, it can be more challenging to deal with freshly washed hair because it’s silky and slippery. Try making a Dutch Mohawk braid on the hair of the second or third day. Natural oils can make your hair easier to manage.
- You, don’t want some part of your hair. The Dutch Mohawk braid is going straight on the back of your head, so you can use a paddle brush or comb to brush them all back to get started. Giving your hair a thorough brush is helpful, though, because you want your hair to be smooth and tangle-free.
- This braid is going down the very middle of your head like a Mohawk—hence the word. Grab a piece of hair right in the center of your forehead. Pick up the hair segment at the front of your head that runs the length of where the bangs will run. Please keep it in one hand.
- Hold the first front part of your hair tightly in one hand and pull it forward a little so that you can deal with your hair behind it. Carefully grab two more strands of hair right behind the first, on either side. You’re going to start your braid with these three strands. Make sure all the strands are equal in size.
- If you like, you can clip up the front section with a claw clip, bobby pins, duckbill clips, or whatever else you’ve got on hand. Then, before releasing the clipped part, you can easily catch the other two strands.
- If you’re familiar with the traditional Dutch braid, it’s not going to be too difficult for you. Don’t worry, though; if you’ve never done a Dutch braid before, it’s not too hard. The Dutch braid is very alike to the standard braid, except that the strands are often put below, rather than above, the other strands.
- First, cross the right line under the middle line. Reposition your hands as appropriate so that the central line is now the straight line, and the right line is now in the centerline.
- Do something again on the other side of it. Cross the left line below the centerline, transfer the centerline to the left. Repeat this pattern too.
- Once you’ve begun the braid, it’s time to start adding the rest of your hair. When you pick up a left or right strand to cross it under the braid’s middle strand, pick up a little hair on the same side. In other words, collect the hair parts on either side of the initial front section that you started with and merge them with the braid’s corresponding side.
- When you get as far down your hair as you want to go, tie it down with an elastic band. If you’ve got light hair, you may want to use a clear band so that it doesn’t distract you from the braid. If you’re going to loosen the braid for a messier effect, you can gently pull the loops to loosen the braid. If you like, you can take out a couple of hair wisps around your hairline to frame your face.
- If you’ve got silk hair that’s susceptible to slipping out of your hairstyles, this move is crucial. Hairspray is also useful if you have flies or shorter bits of hair that appear to get loose. Give your hair a spritz anywhere you need it, but make sure you’re not going overboard. You certainly don’t want an immobile, crunchy braid! Once you’re sure that all is locked in order, you’re all set up.
How long does the mohawk braid last?
They can last a few days of days, depending on the type of mohawk braid. If you’re not doing a lot of physical activity when it’s a tighter braid, and you’re sleeping with a silk scarf or a bonnet to avoid frizz, you’re probably going to get two or three days of wear.
How to wash mohawk braids?
- Shampoo and Soak. Soak your braids with water before shampooing, and then apply your shampoo.
- Be thoroughly rinsed. Thoroughly rinse; repeat if necessary. I suggest using a light conditioner to add some moisture back in.
- Dry your braids full.
- Product Apply.
How to sleep with braids?
To cover the front of your hair, you’ll want to tie your scarf around the ends. The bonnet keeps the individual braids out of the way when sleeping to protect them from becoming frizzy. It can cut down on frizziness and protect the edges.
Do mohawk braids damage your hair?
Braids will help you keep hair out of your face without a lot of strain, whether it’s a Mohawk, French, boxer, or single tail. Make sure you’re not pulling too tightly when you put them in not to cause hairline breakage.
Difference between mohawk braids and regular braids
Mohawk braids
Mohawk braids have a traditional Mohawk pattern that goes down the middle of the head.
Regular braids
It’s the braids’ baseline. Alternately, taking three sections of hair, passing each area over a middle strand on either side, think of it as juggling hair.
Which hair is more likely used for mohawk braids?
You want to use good synthetic extension hair when making the mohawk braid style. The Sensational Pre-Stretched Synthetic Hair will get the job done for this reason. You would also want to make sure that your hair is really moisturized and detached beforehand for greater convenience. Pomade will also be significant in the success of the theme.
Can you mohawk braids without extensions?
Yes, we can make mohawk braids without extensions. An excellent protective styling choice that helps you keep your hair hydrated and removes stress caused by heavy extensions is mohawk braids on your natural hair.
Hairstyles for Mohawk Braids
1) Rocked punk look

Some people are longing for the rocker look, and this one suits the bill. This look gives you a mix of a Mohawk with braids and a little color spray to set the mood. Any other braid is colored white to make them look almost Frankenstein’s appeal. This might be something you’re doing when you’re going to an event to attract everyone’s attention.
– The best thing about this type of look is that you can add any color you like, whether it’s red or pink or even blue, to make your signature look.
2) Turn over Mohawk

Bleach blonde hair reaches the wave of surfers. This hairstyle is all about the flip. Braiding on the side is just an accessory to the whole look of a blonde hair flip. The braids have a distinctive look as they pass vertically instead of the conventional horizontal braid.
3) Graceful Mohawk

This Mohawk is no less badass than any others, but it helps you look Mohawk with no effort to shave your head. It’s all drawn near to the ends, and the braid makes the real Mohawk. It’s elegant, and everyone can pull it off.
4) Mohawk along with fishtail

The Mohawk fishtail has everything you need for a dramatic look. The head has a side shave all over with the best fishtail braid I’ve seen in a long time—the blonde’s mix and the intricate braid on the back. If you’re long, you can get an eye-catching look.
5) Tri braided Mohawks

All three of these looks have the same theme: shaved heads. That’s what makes them all the same; the hawks are what makes them different. Try short with some red on top, or if you’ve got long hair, make up a ponytail, or if curly hair is your passion, then pile it up high.
6) Alien look Mohawk

It’s a reminiscent look of the Alien movie franchise. If you’re looking for a look that everybody will have to talk to, then that’s it. The ice-cold blonde cools down this whole look, and you don’t need to shave your head. The tight braid wraps up into the tunnel shape to complete this fabulous look.
7) Mohawk with ponytail

Multiple twisted dreads are coming together to give us this super cool hairstyle. The dreads start thinner and get thicker as they pass toward the Mohawk. Thin dreads are simpler to play with to build a pattern on the front. If you’re not sure you’re going to get a complete mohawk, choose this look.
8) Mohawk updo

African women have often been considered to be styling their hair in stunning protective hairstyles. It’s one of them. Can you believe that these hairstyles’ object was not only to look beautiful but to keep their hair away from their faces?
9) Perfectly aligned Mohawks

If you’re all about clean lines when it comes to your hairstyles, I’m sure you’re going to find this one especially pleasing. It’s just amazing how imaginative hair stylists are getting in these days. This Mohawk starts with small, perfectly spaced cornrow braids. Also, take note of the three distinct patterns in the row.
10) Mohawk with curls

This curled Mohawk is gorgeous and very simple to achieve. Braid your hair in medium-sized cornrows on the sides and back. Braid them until you get to the top of your head. Instead of tying the rest of the way down, curl the ends of your hair. Join the curls to make the Mohawk.
11) Mohawk with thick and long curls

Mohawks are a perfect way to flaunt your natural kinky hair. Braid angled cornrows to cover your head and lose the lower half of your hair. Gather all your loose hair to make a mohawk. Apply the cream definition curl and wrap your curls in a scarf every night to add your curls’ definition.
12) Mohawk with close braids

This hairstyle is the most excellent stuff for protecting trends in hair extensions. They make your hair look longer and thicker. You don’t even need to tint your natural locks! This cool braided Mohawk uses them as an advantage. The loose curls at the top that falls to the side add a charming touch to the look.
13) Fully braided Mohawks

Braid your hair in any protection. Weave your braids up and close to your scalp until you hit the tip. Weave the braids naturally until at the information. Divide the braids into horizontal bits. Twist each segment to form Bantu nodes that align to create a mohawk. Join the Bantu knots using bobby pins or U-pins.
14) Braids in a pattern

Patterns are fascinating and curious. It’s no wonder we mixed them with the hairstyles to make them look cool. Take your braided Mohawk up a couple of notches with some surreal designs. It’s time to be imaginative.
15) Mohawk with double braids

If you think a braided mohawk needs cornrows or other thin black braids, check out this look. The braid on top of the braid was connected to form a single braid on the nape. The sides were shaved off to finish off this fabulous look. This is only going to show how versatile a braided mohawk can be.


